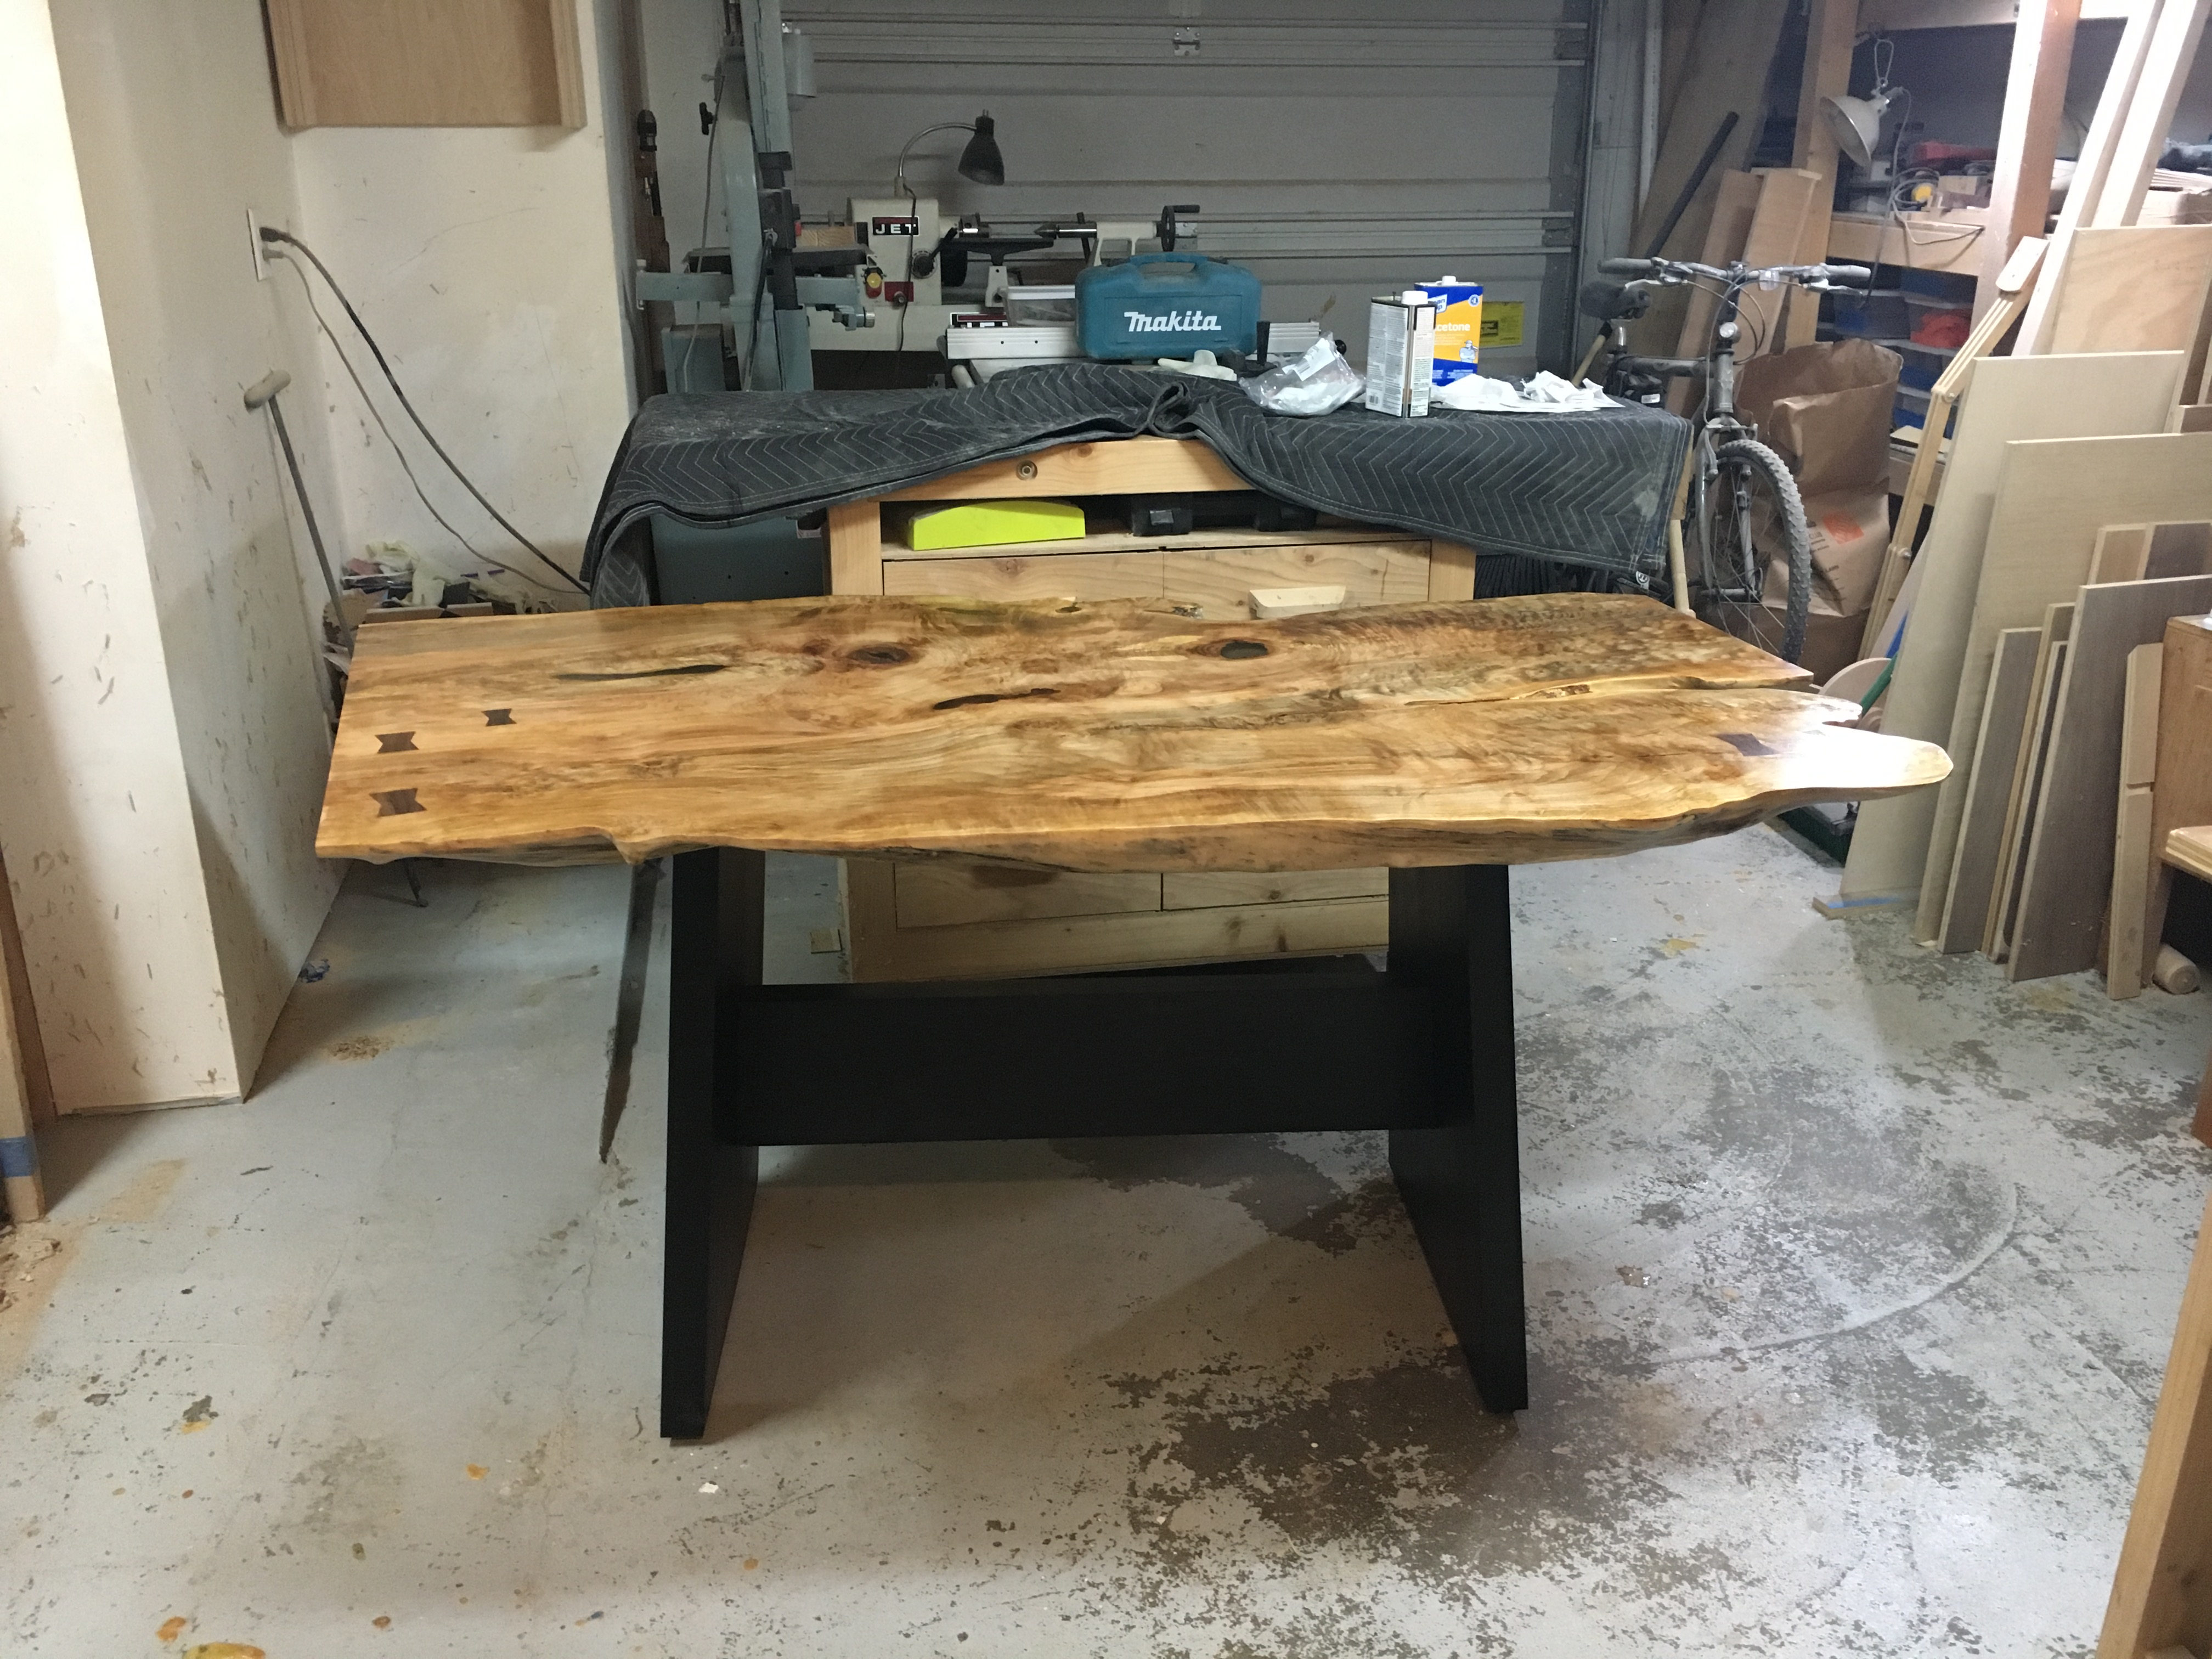
Slab Dining Table
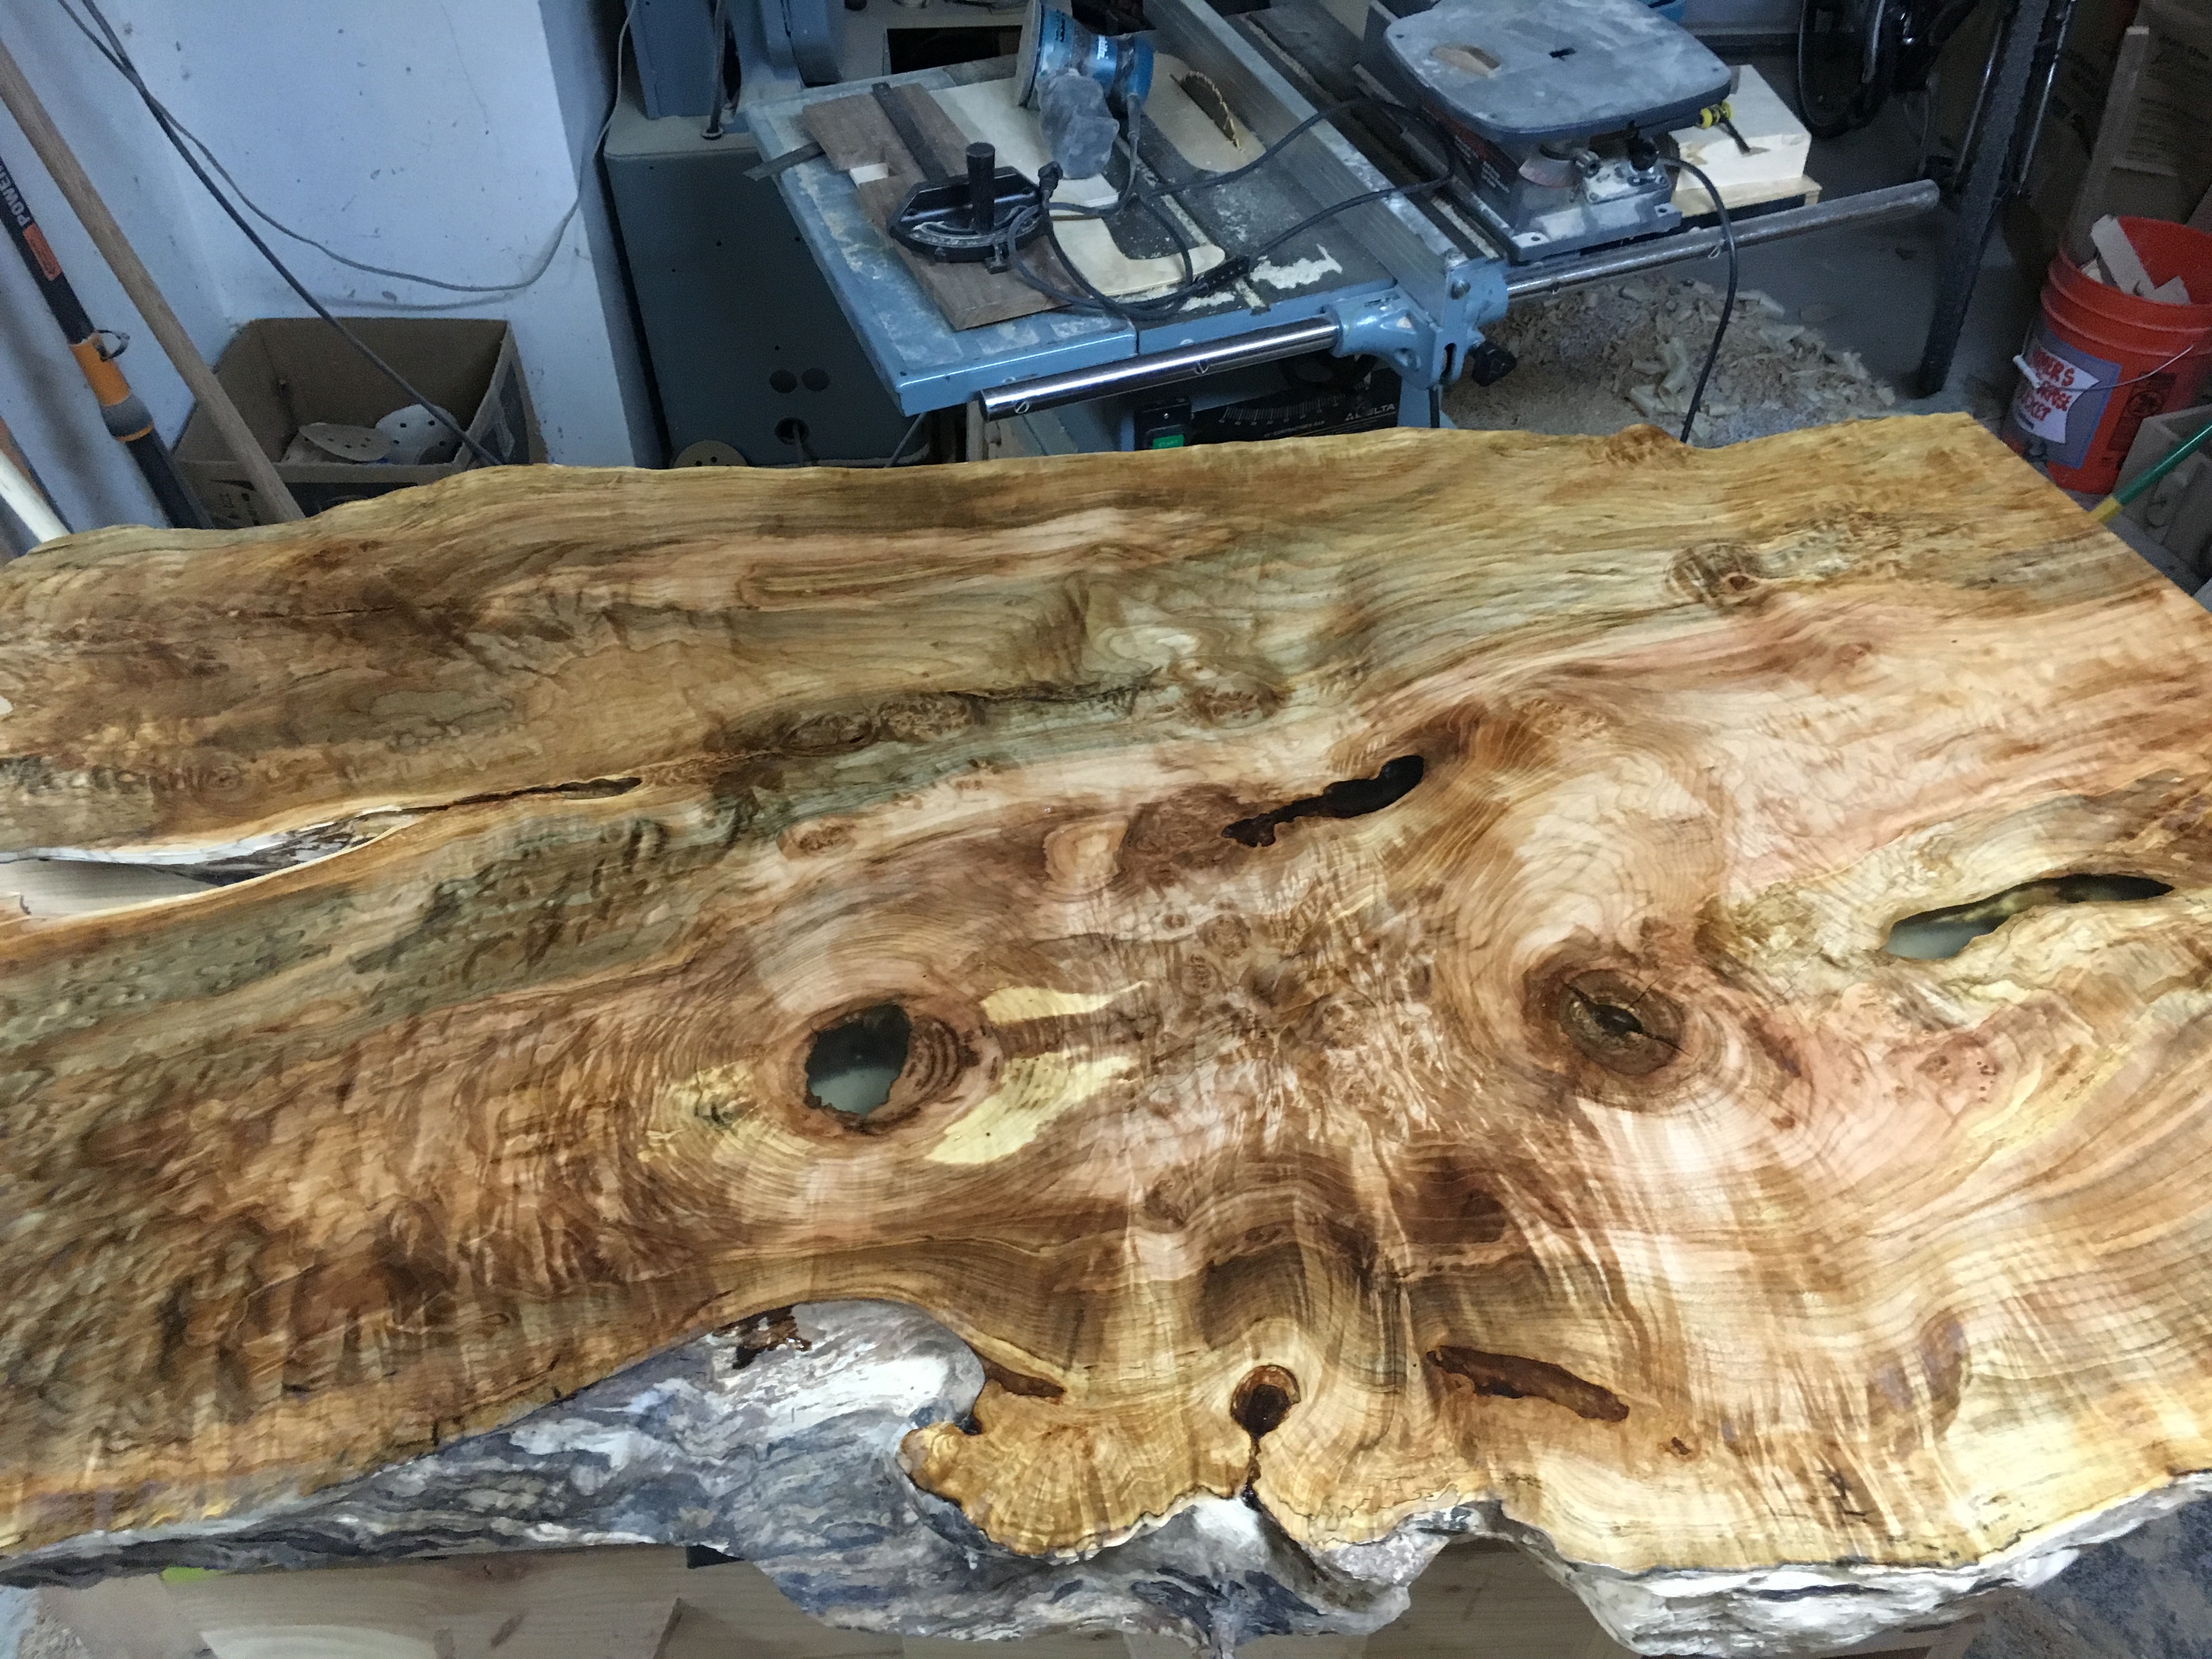
In March of 2016, I bought a large maple slab off of Craigslist. I was feeling particularly ambitious and thought I would try my hand at making a large slab dining room table.

It was sold to me as having been air-dried for 5 years, but I figured I should let it sit in my shop for a while to acclimatize. Fast forward to October of 2016, and began the process of flattening it.
I took a stab at flattening it by hand, but the grain was just too random in many spots to really be practical. So I set up a jig to flatten it by using two flattened 2x4s made to be perfectly coplanar. I propped up the slab on the floor to select the plane I was going to choose and got to routing.
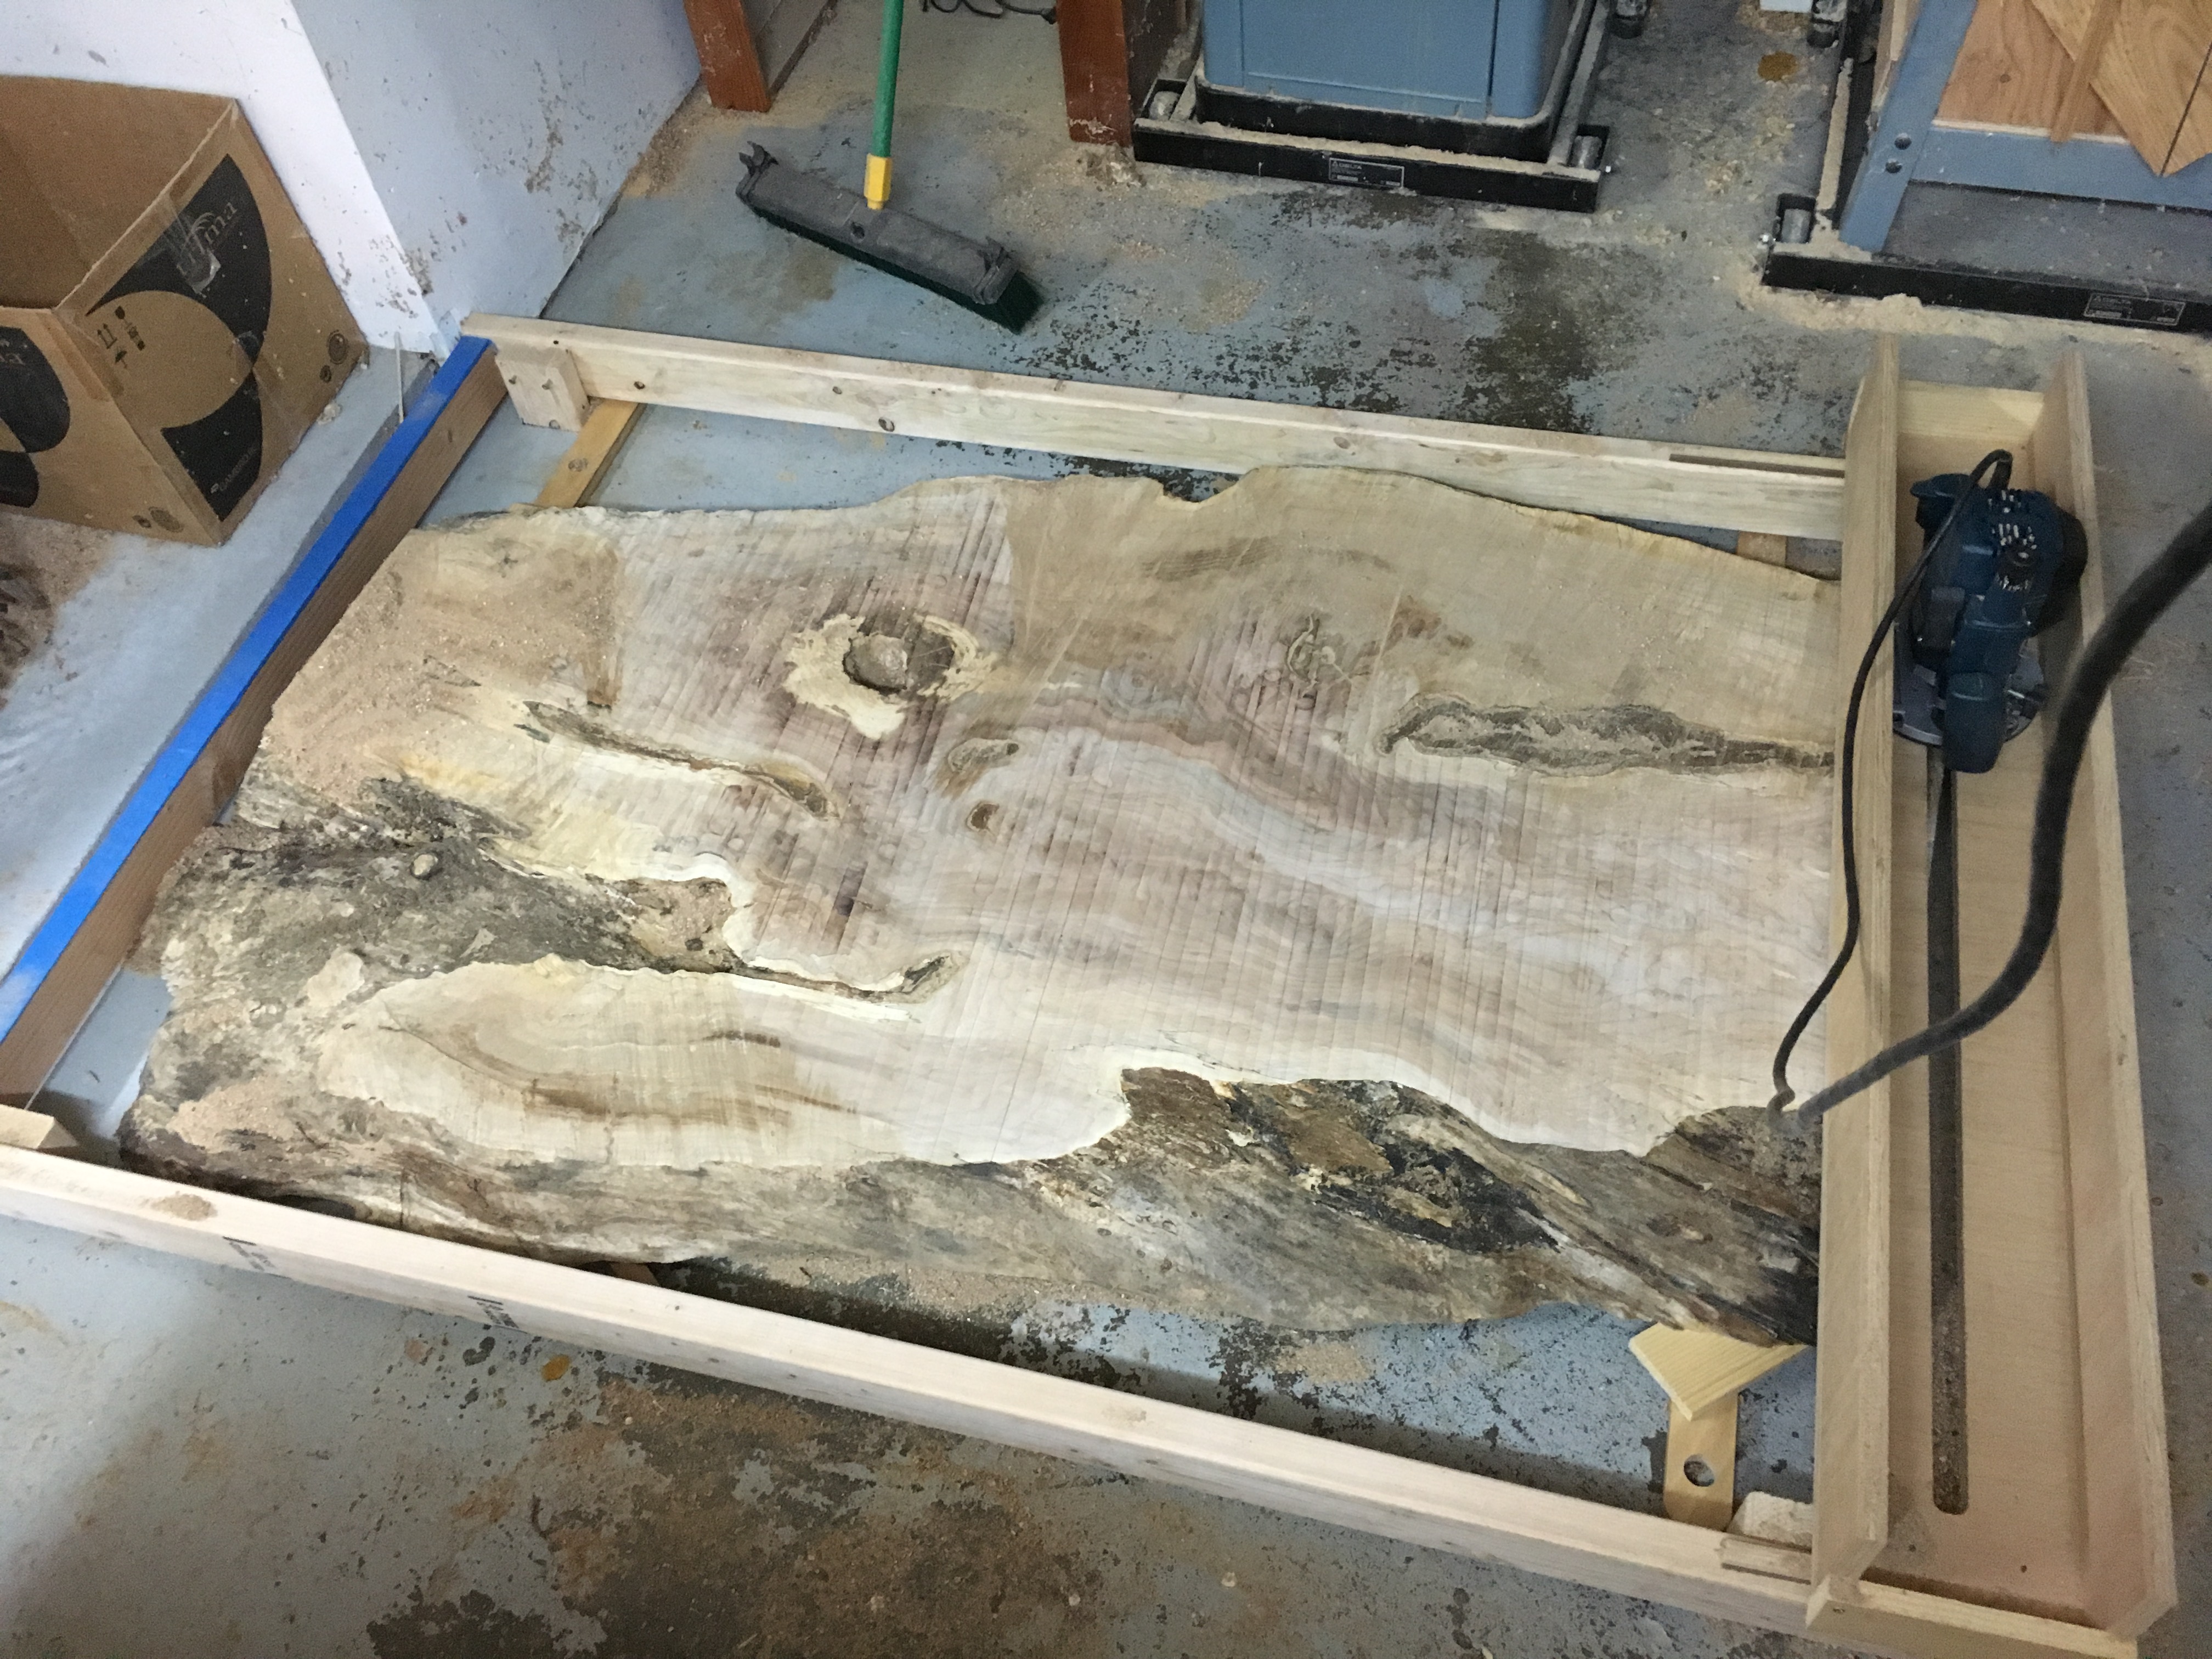
After about 4 or 5 hours of routing, I finally had one face done. Over the course of flattening this first face, I had to lift the slab up a couple times because of the limited vertical travel of the router. I flipped it over and took pains to make sure that the surface that the now-flat side was resting on was coplanar with the rails. It turns out that I was about 1/16” off on one side compared to the other, and though I did try to remedy that, I couldn’t ever get better than that.
Another 6-8 hours of routing, and about 50 gallons of shavings later, and I had a flattened, thicknessed slab.
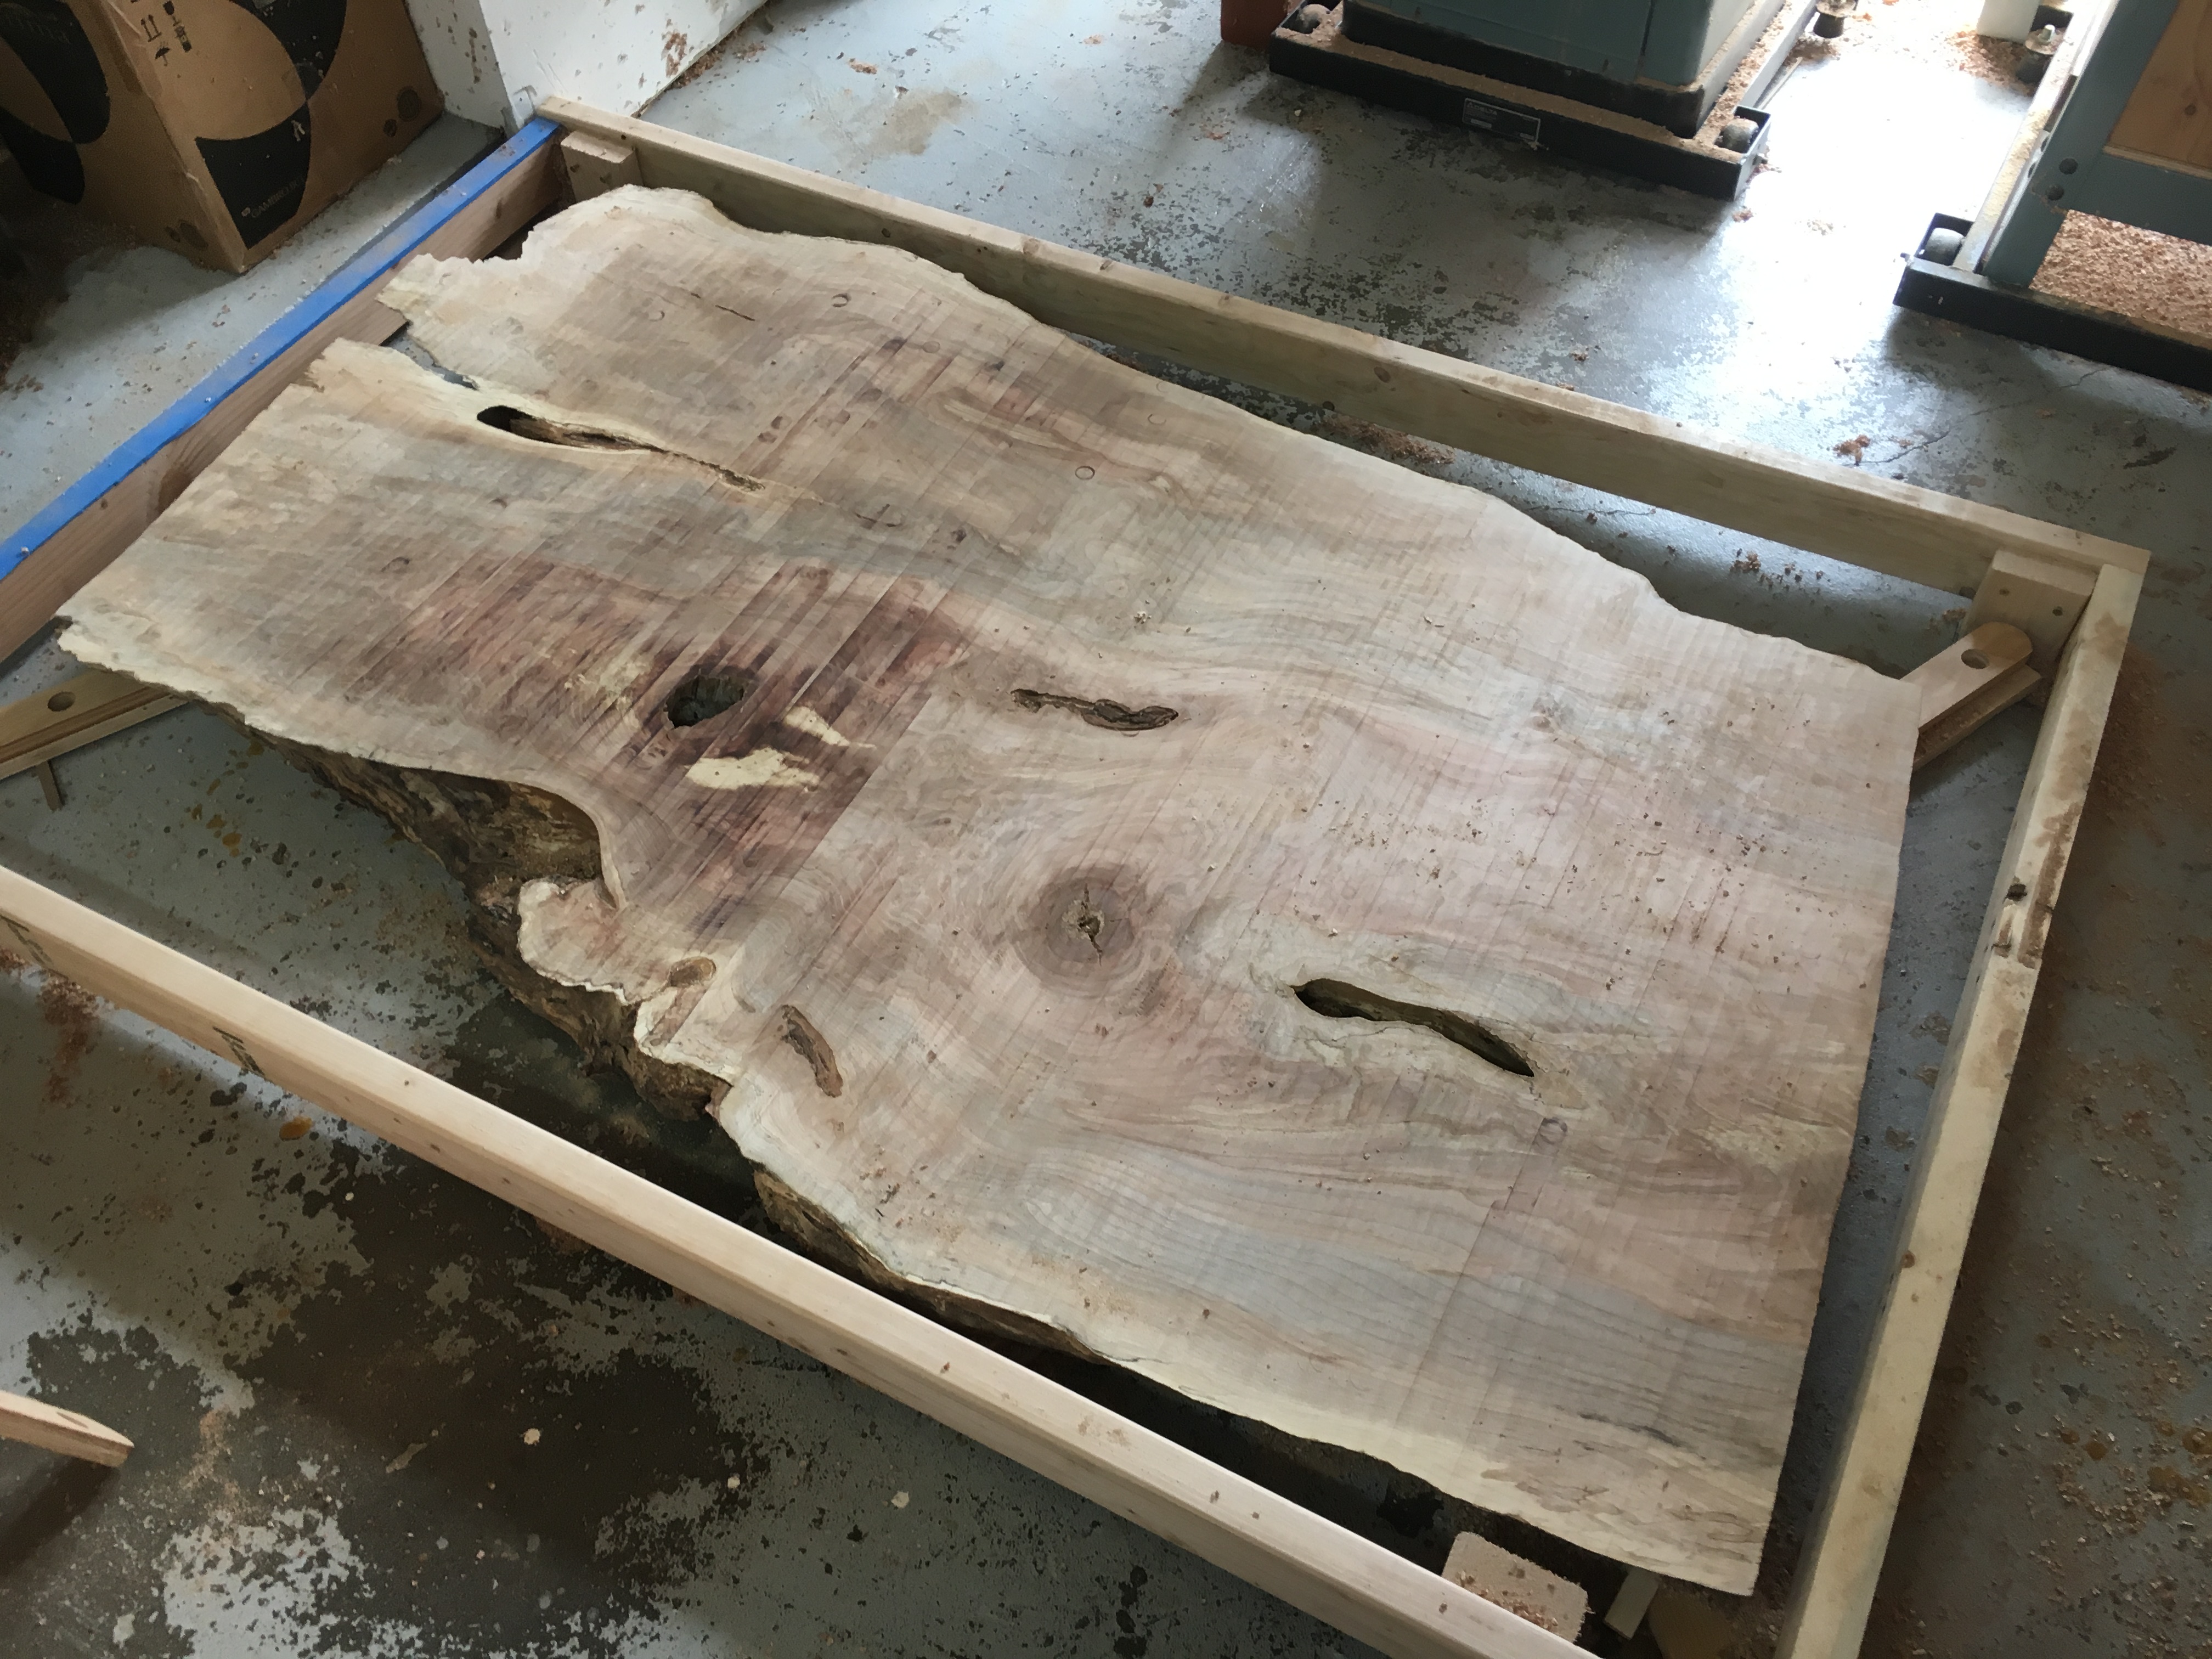
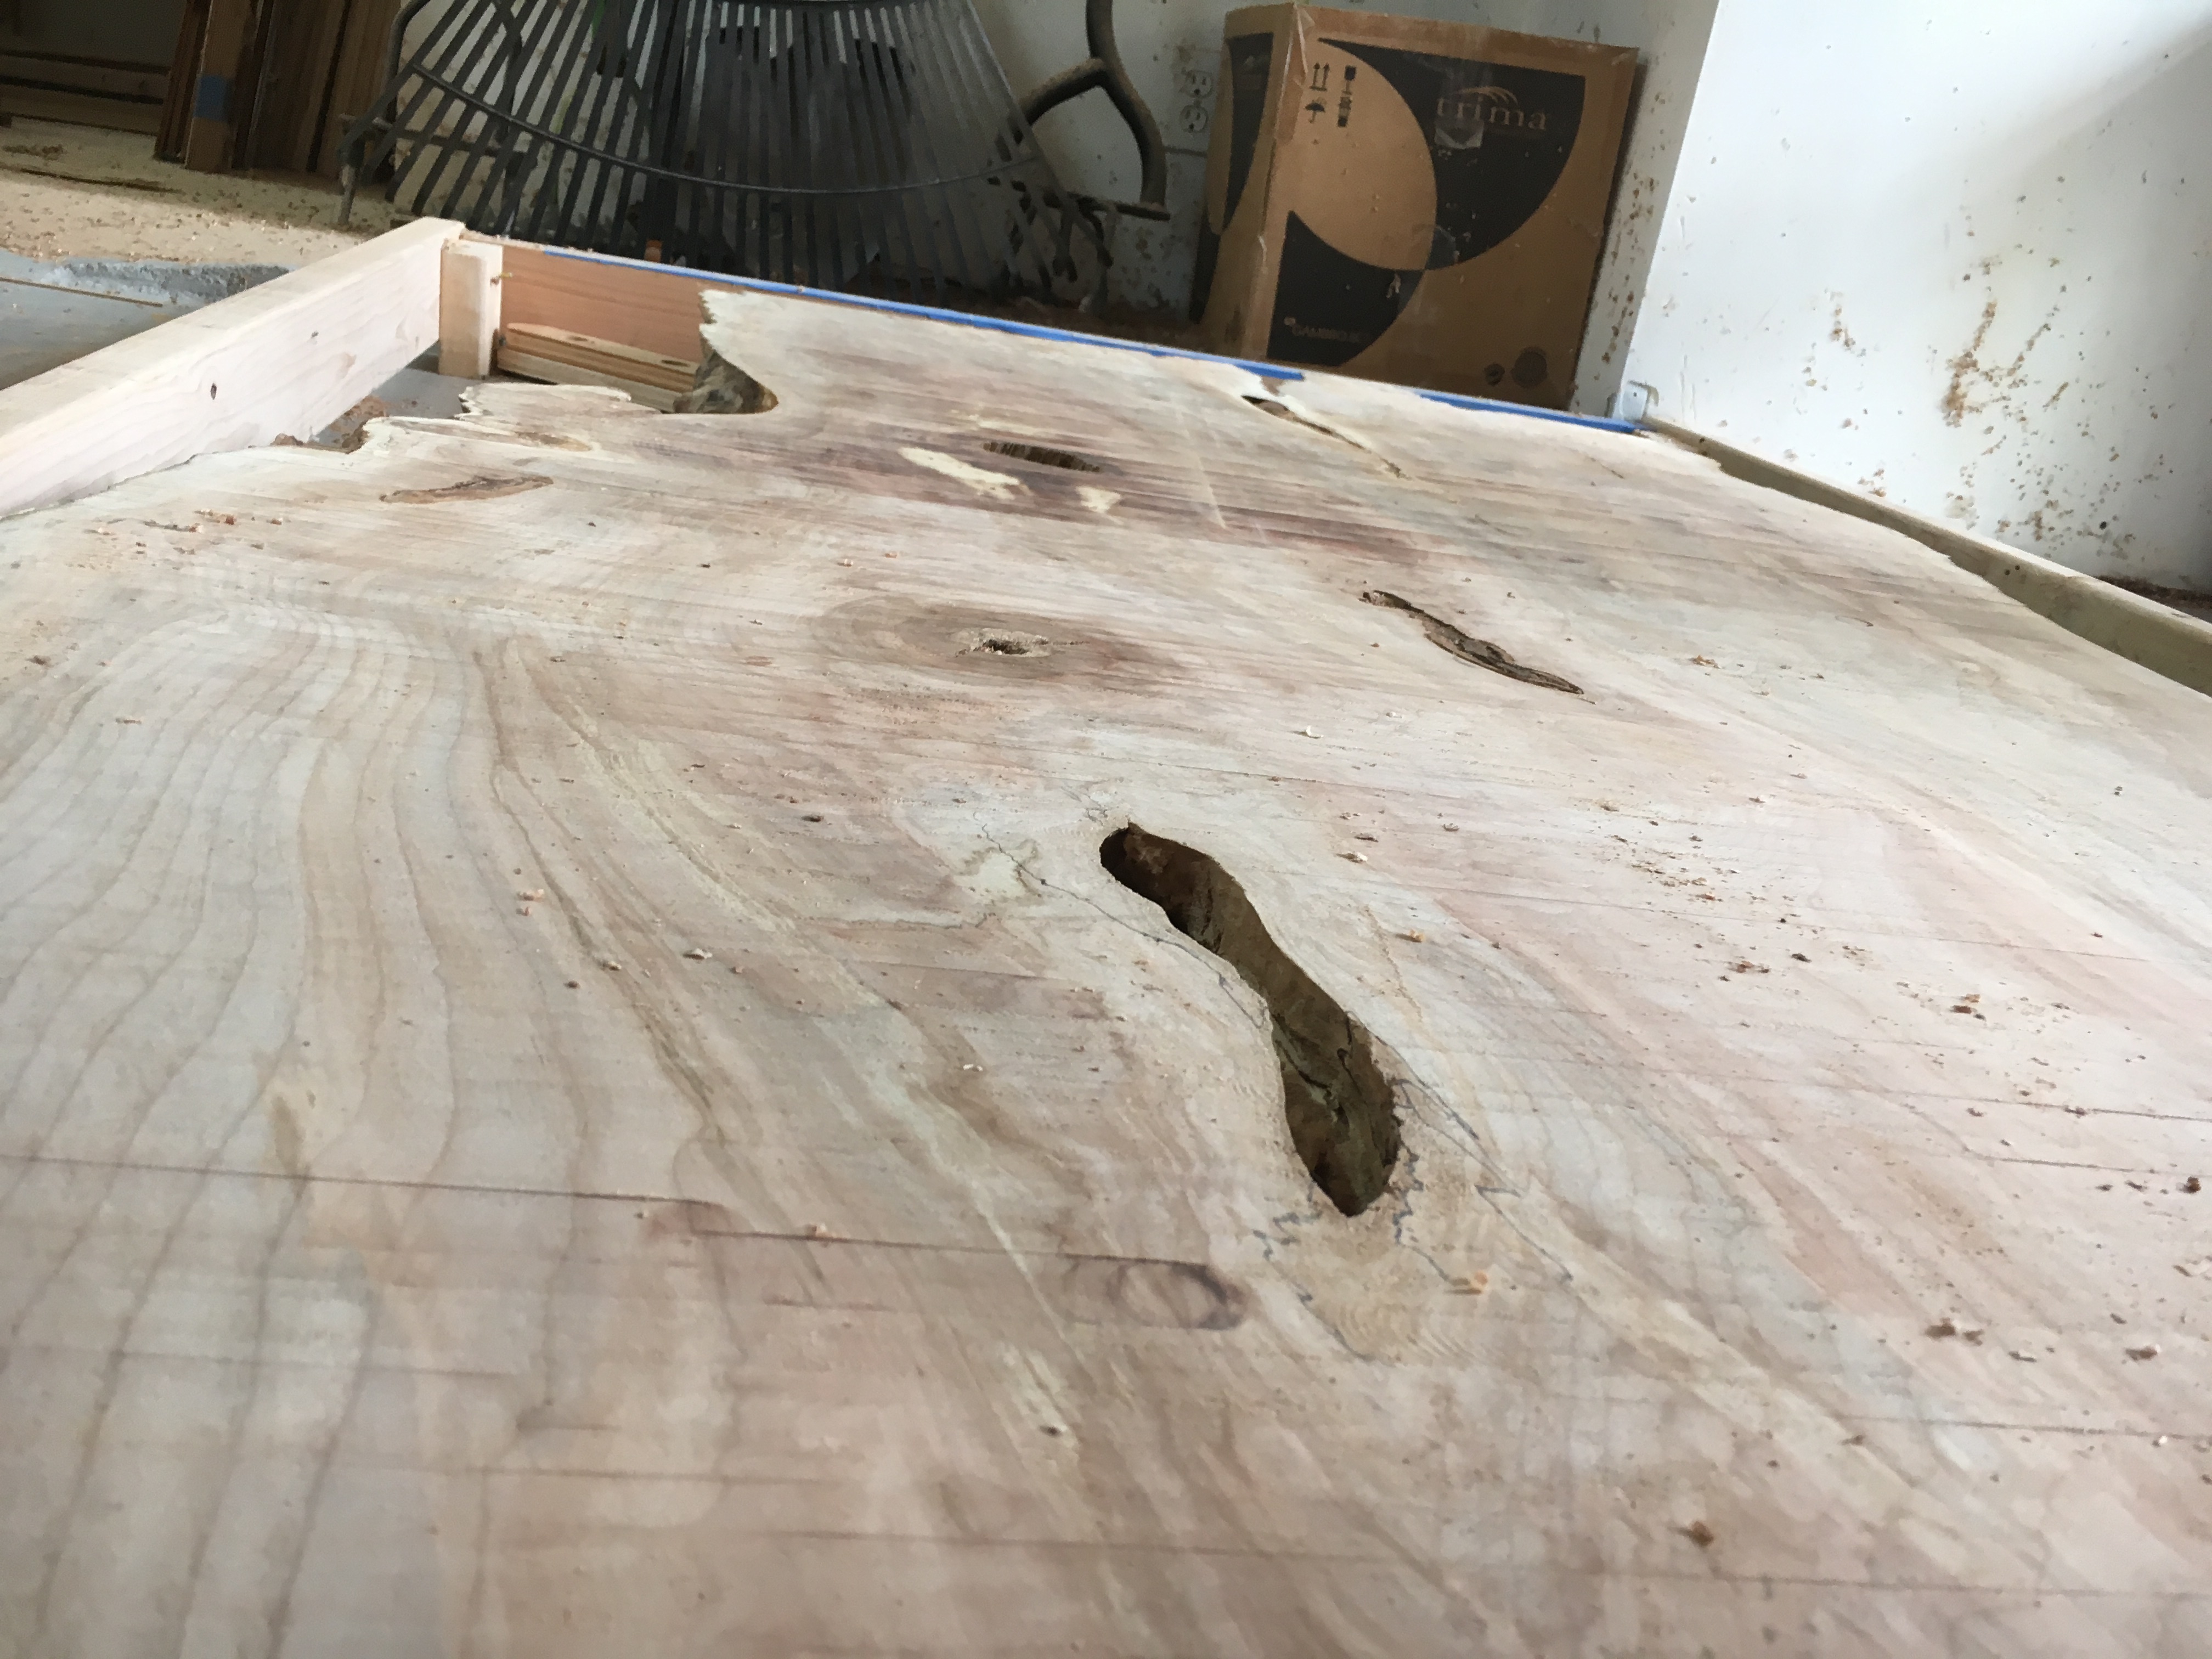
There were a number of spots that were pretty punky, so that surface is not spectacular at this point.
With the top roughed out, I turned my attention to the legs, made out of several pieces of 8-quarter maple glued up into a panel.
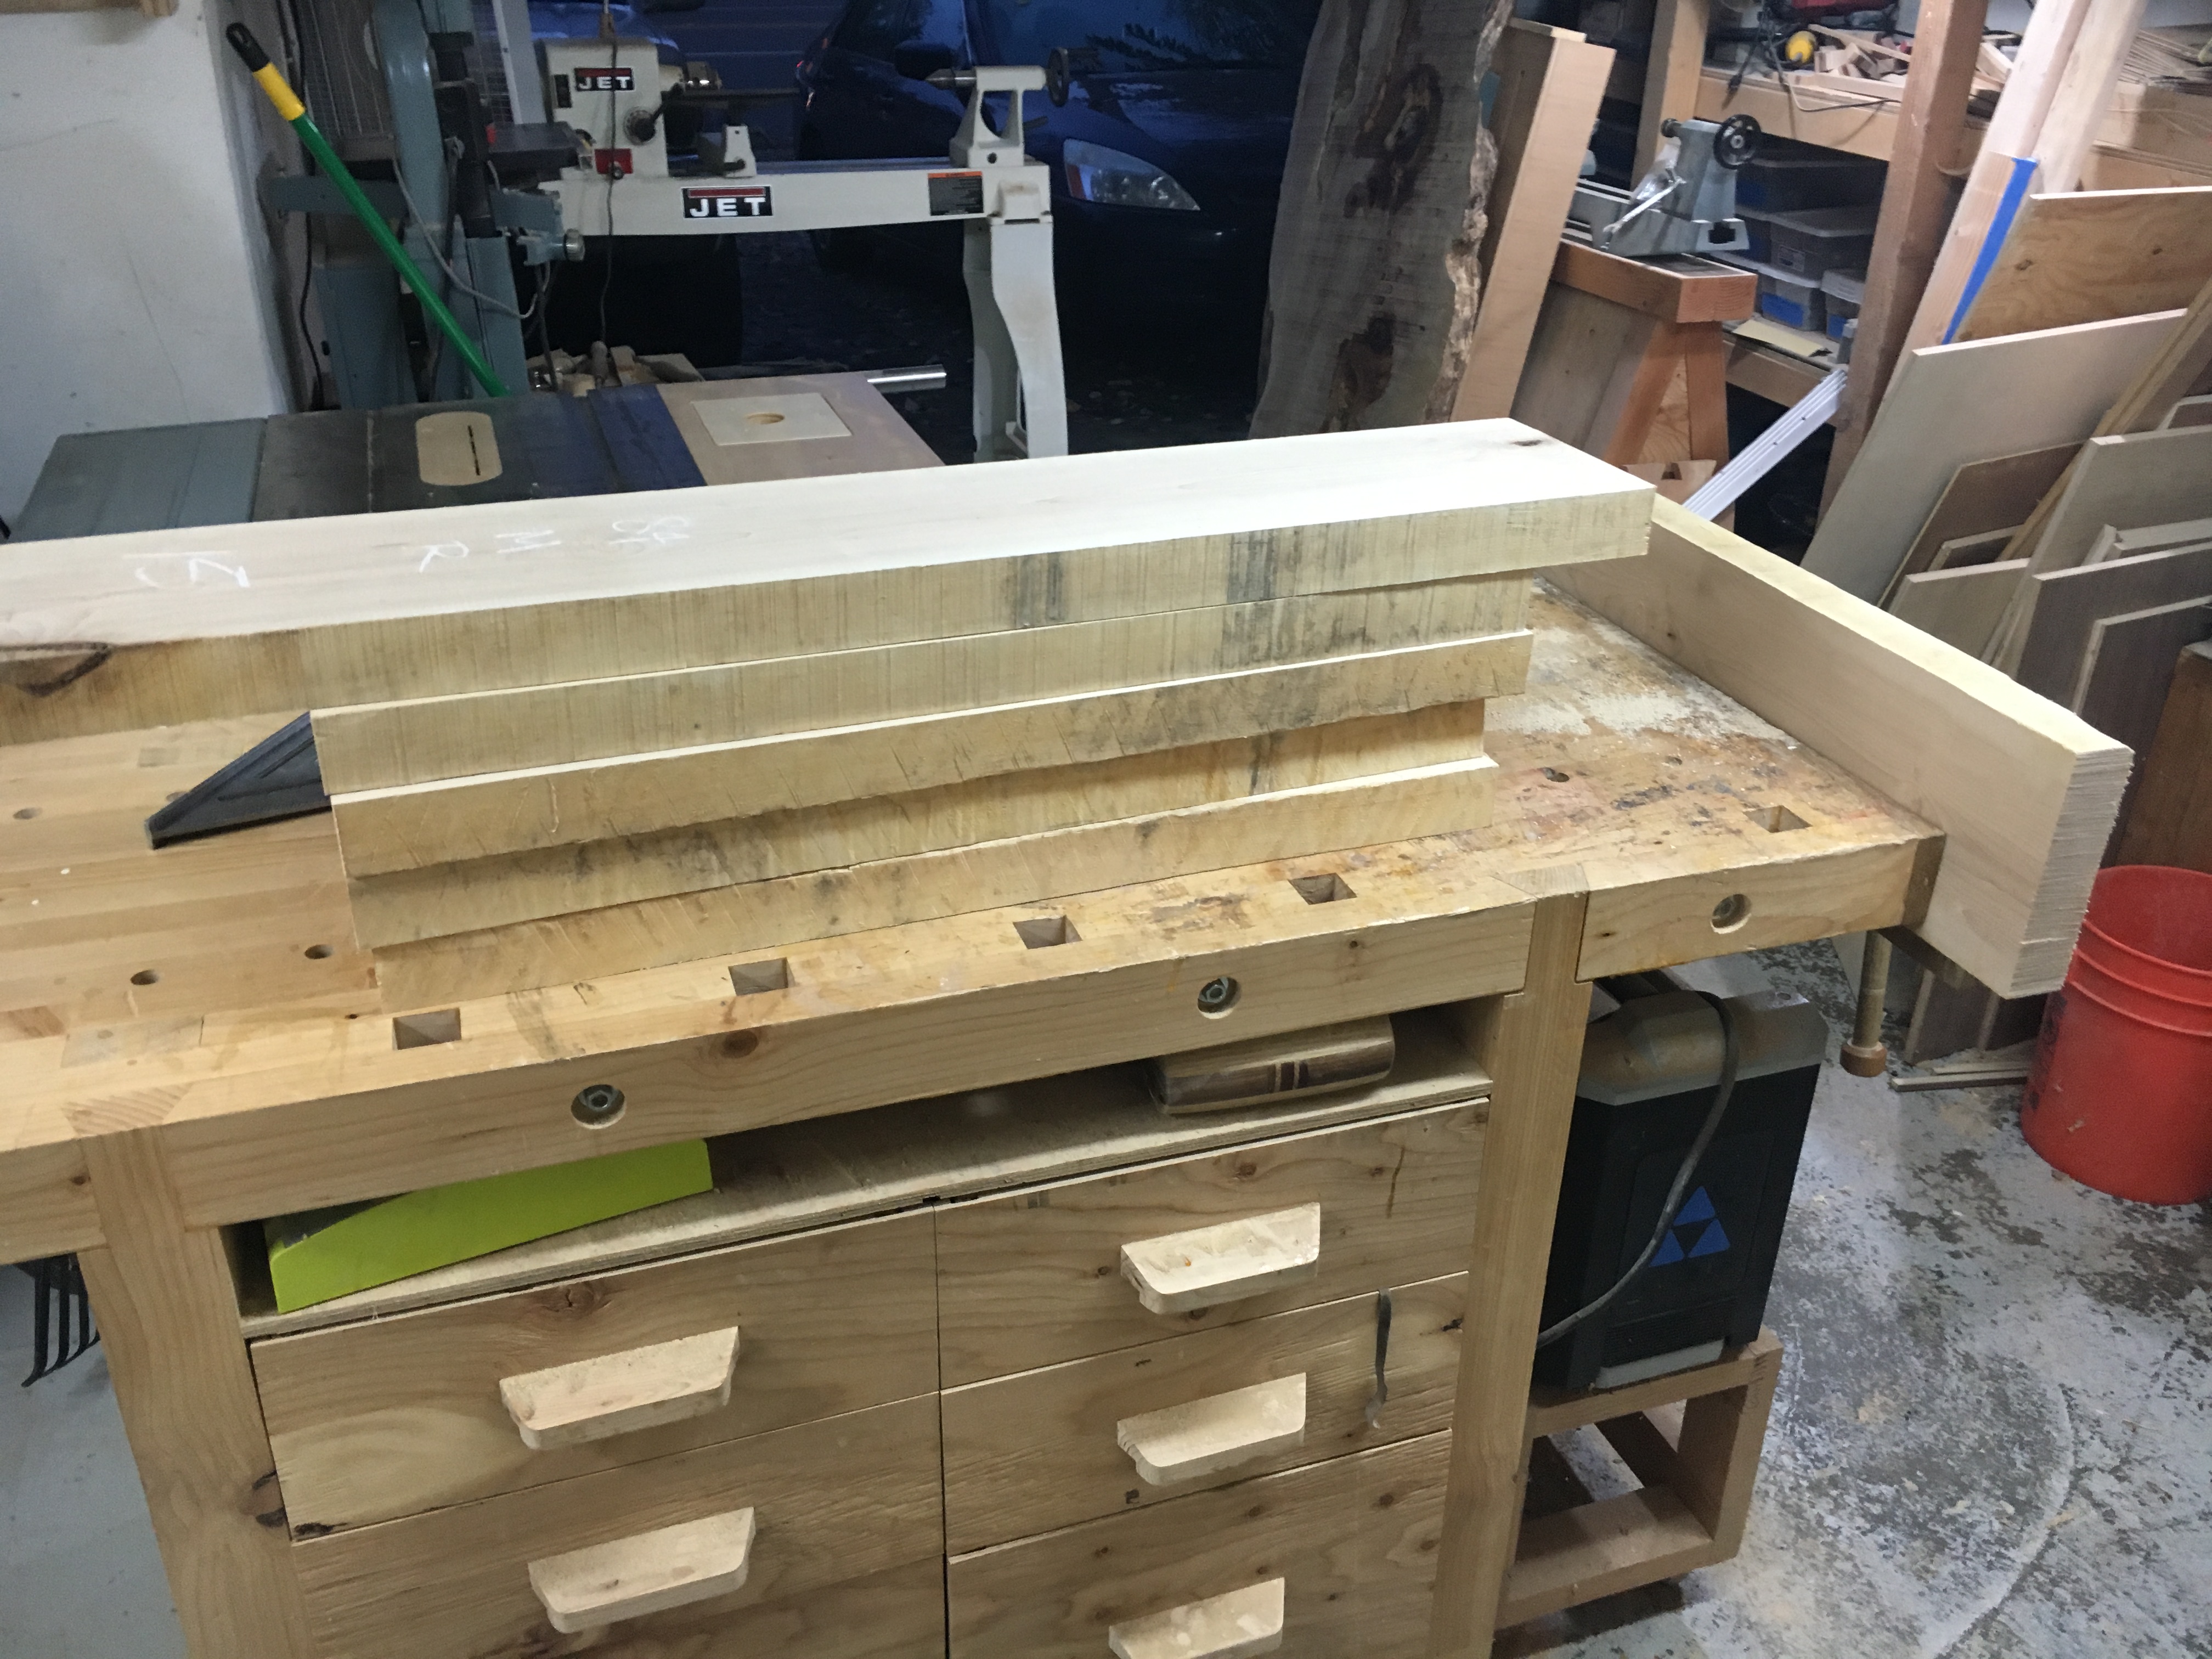
The legs were going to be splayed, so once I glued up the panels, I chose a pleasing angle and tapered them from bottom to top. This angle was also chosen as the angle at which the legs would be splayed. I set them on the table held up by clamps to match the angle from the bevel gage to see what it would look like.
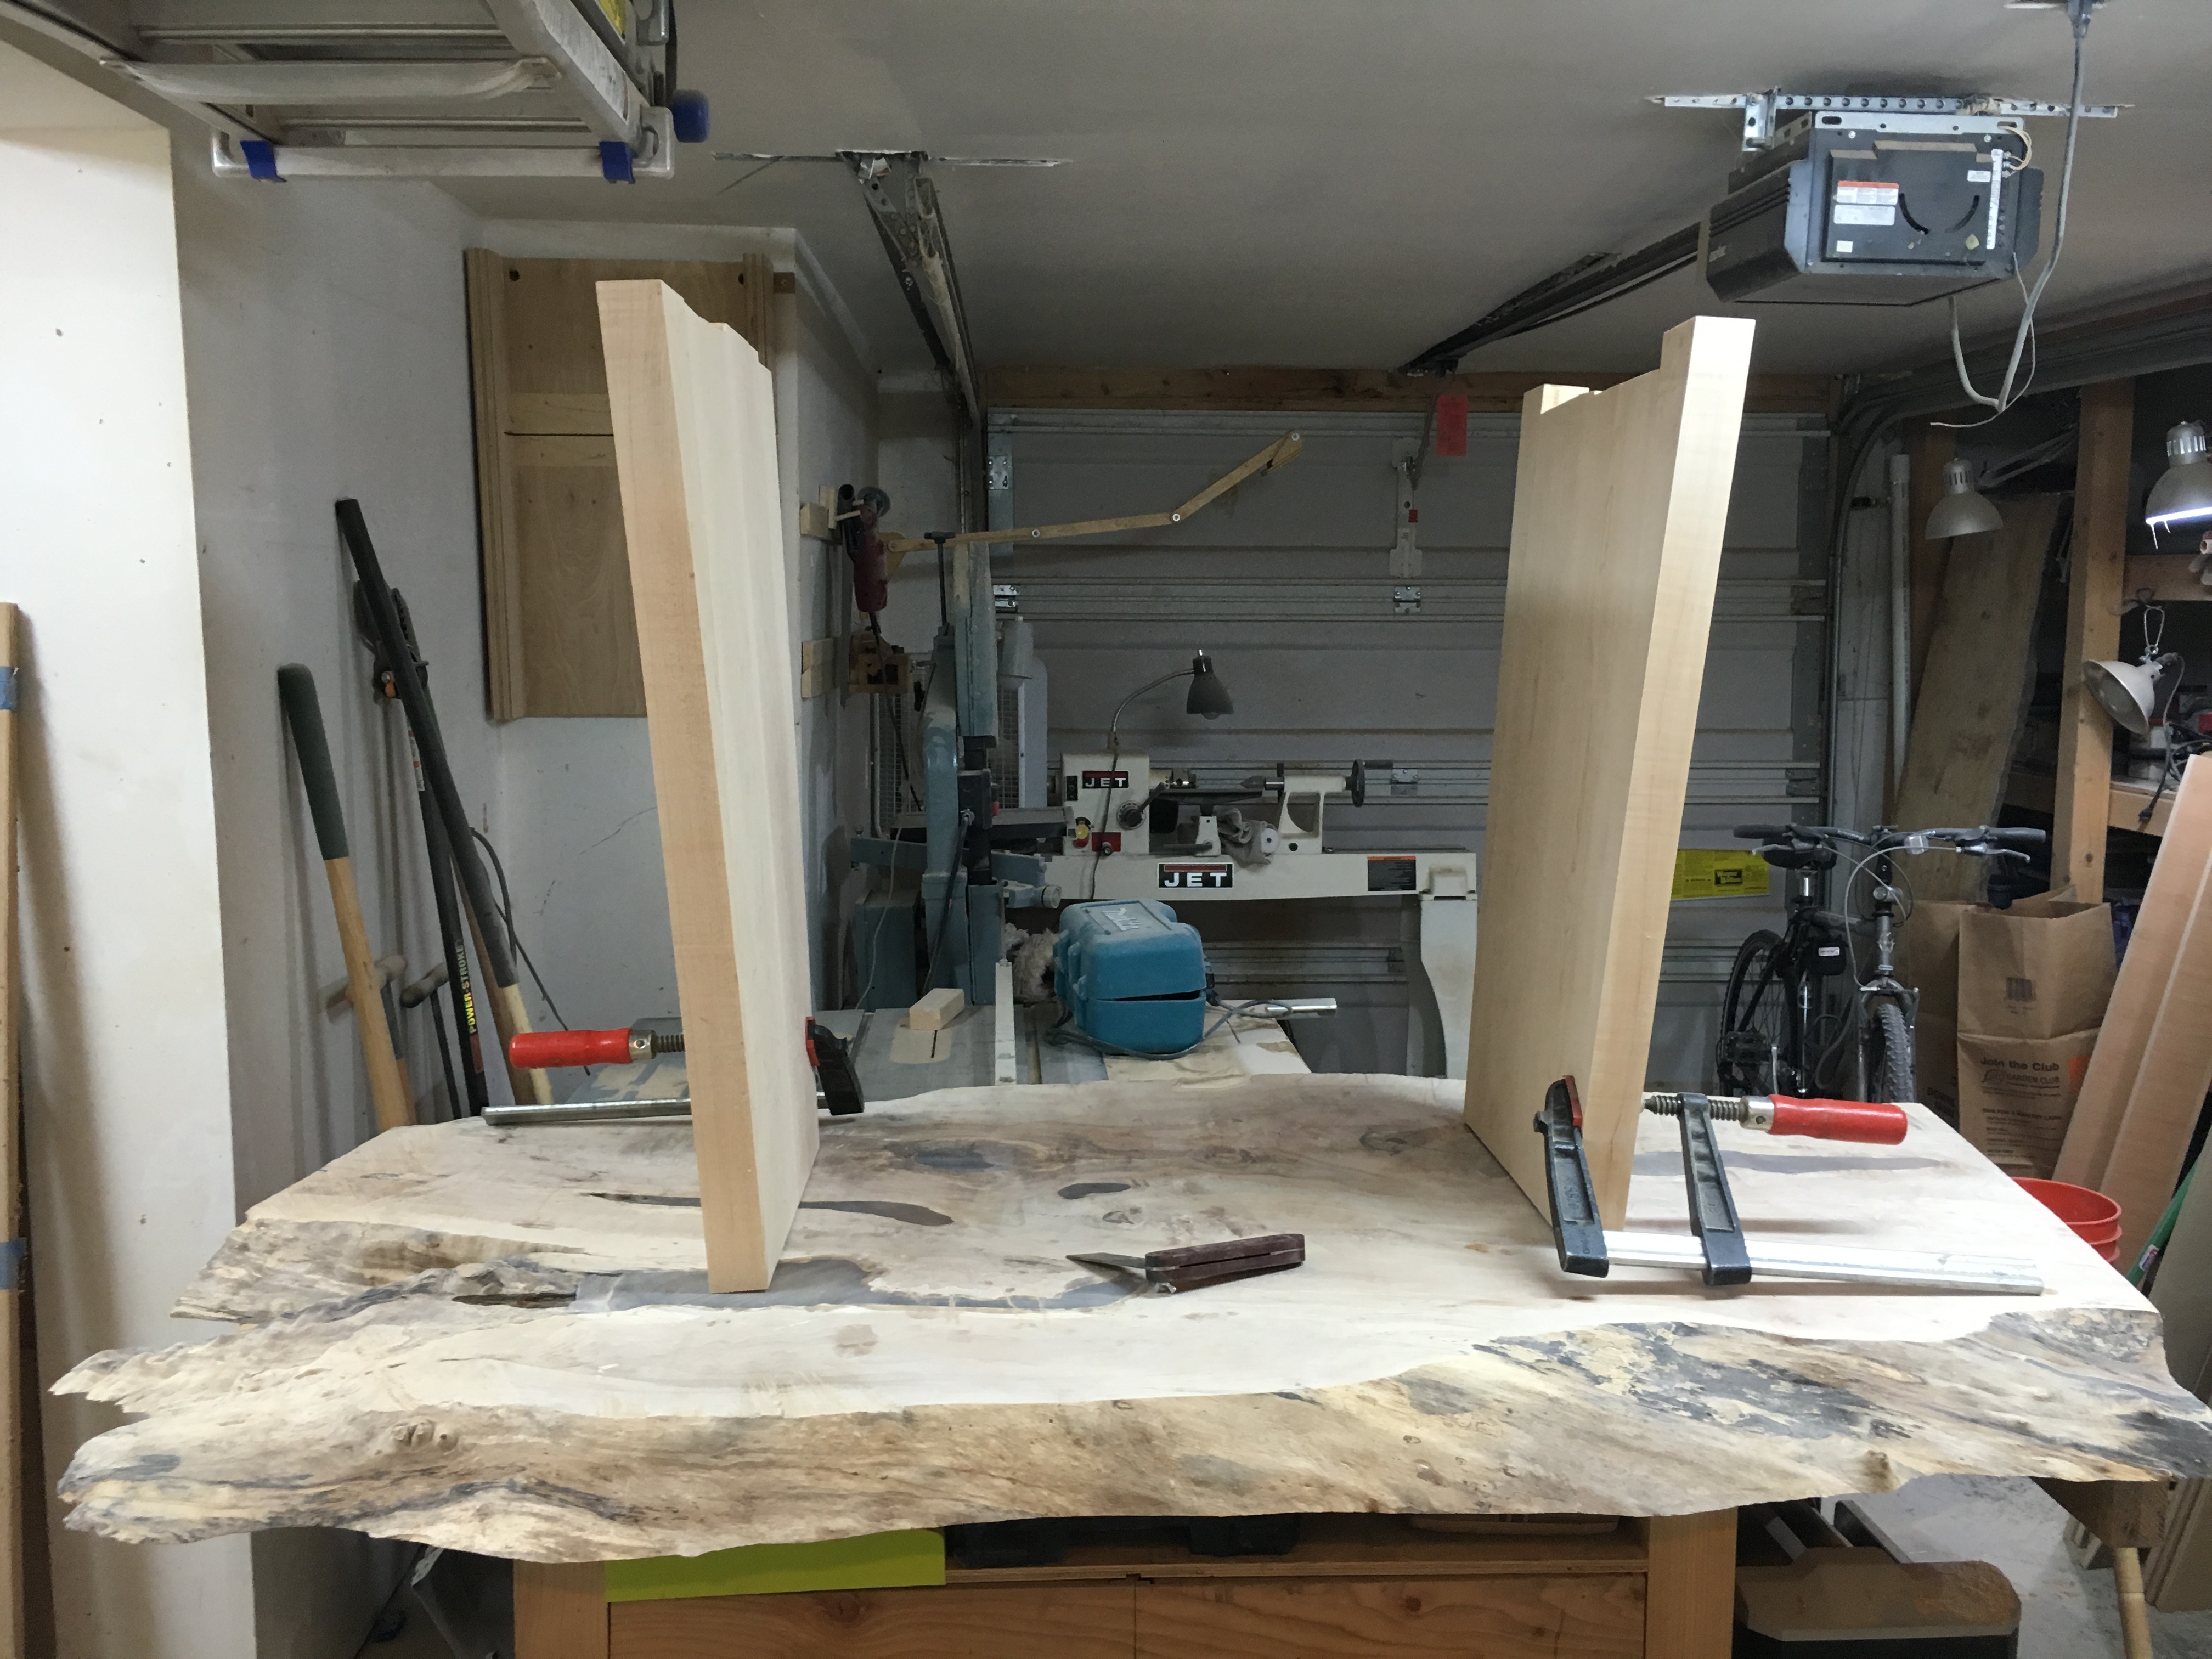
I cut 1-1/2”-long tenons into the top of each leg, taking care to make sure that they were vertical, rather than in line with the leg. Since they were splayed, this meant that both the shoulder and the tenon itself were at an angle relative to the panel. I routed out the corresponding mortise in the underside of the table top, which allowed me to set them in, support them, and measure for the cross support.
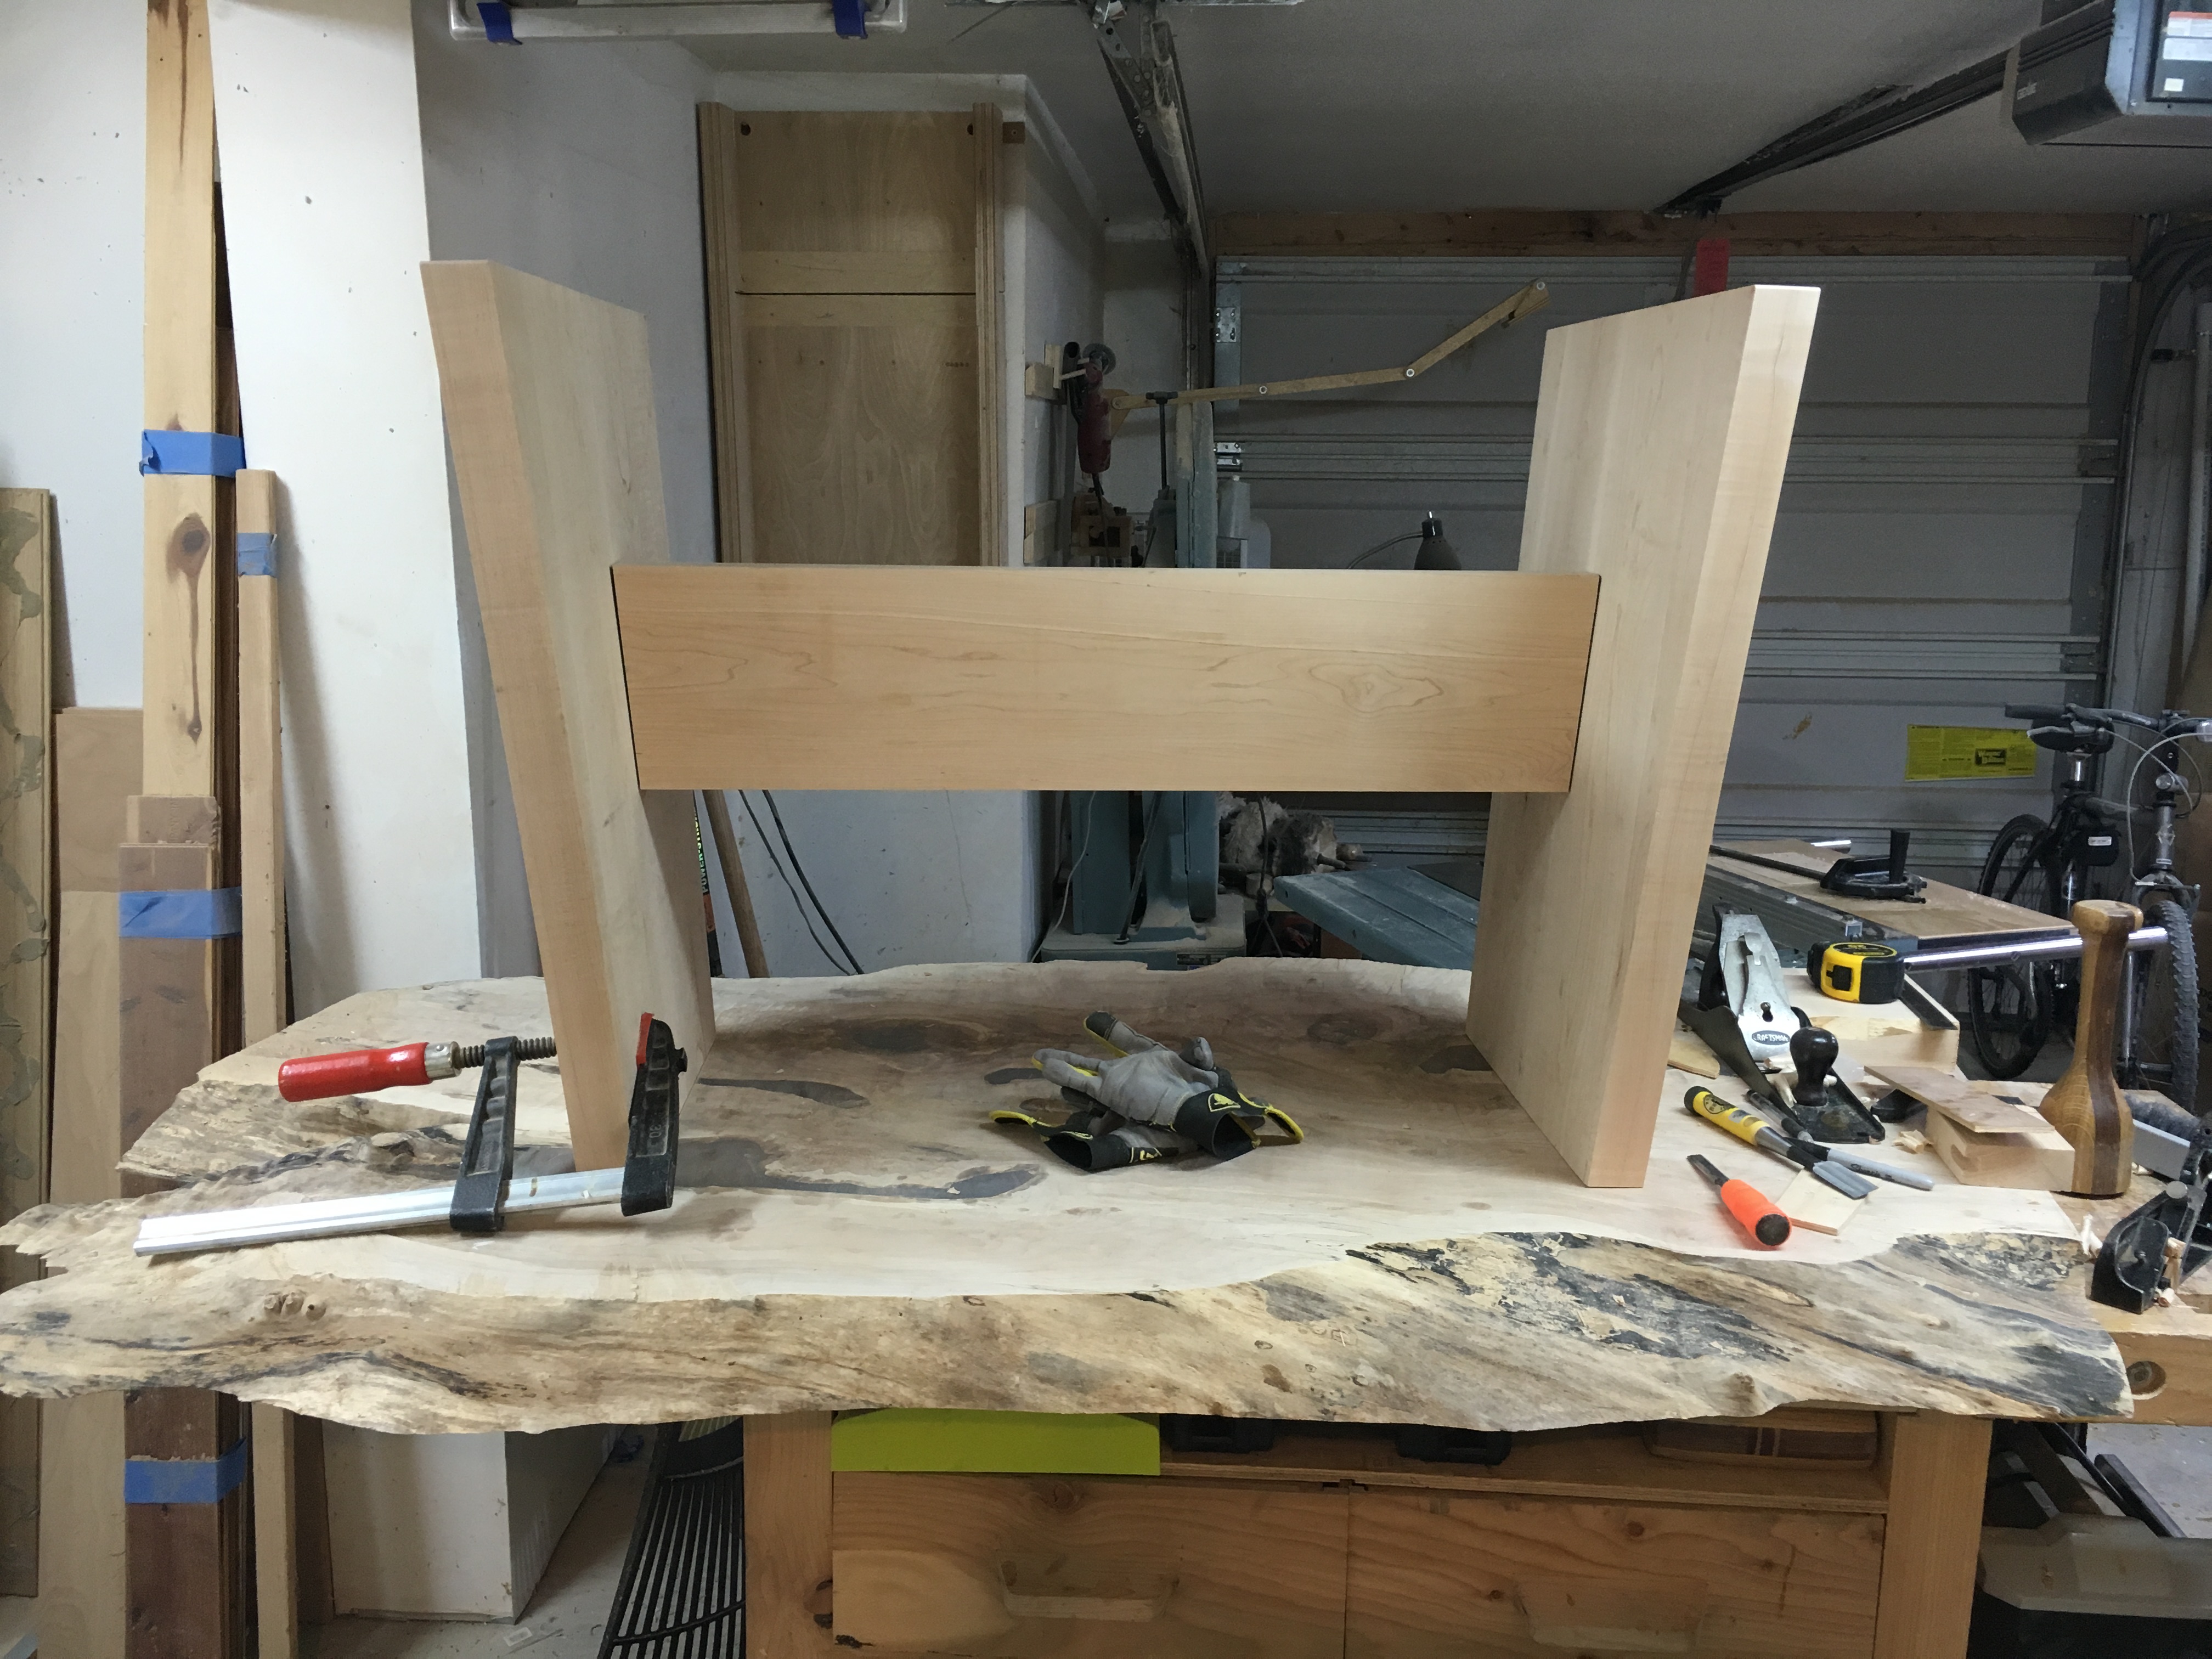
The cross support, too, was connected to the legs with a mortise and tenon.
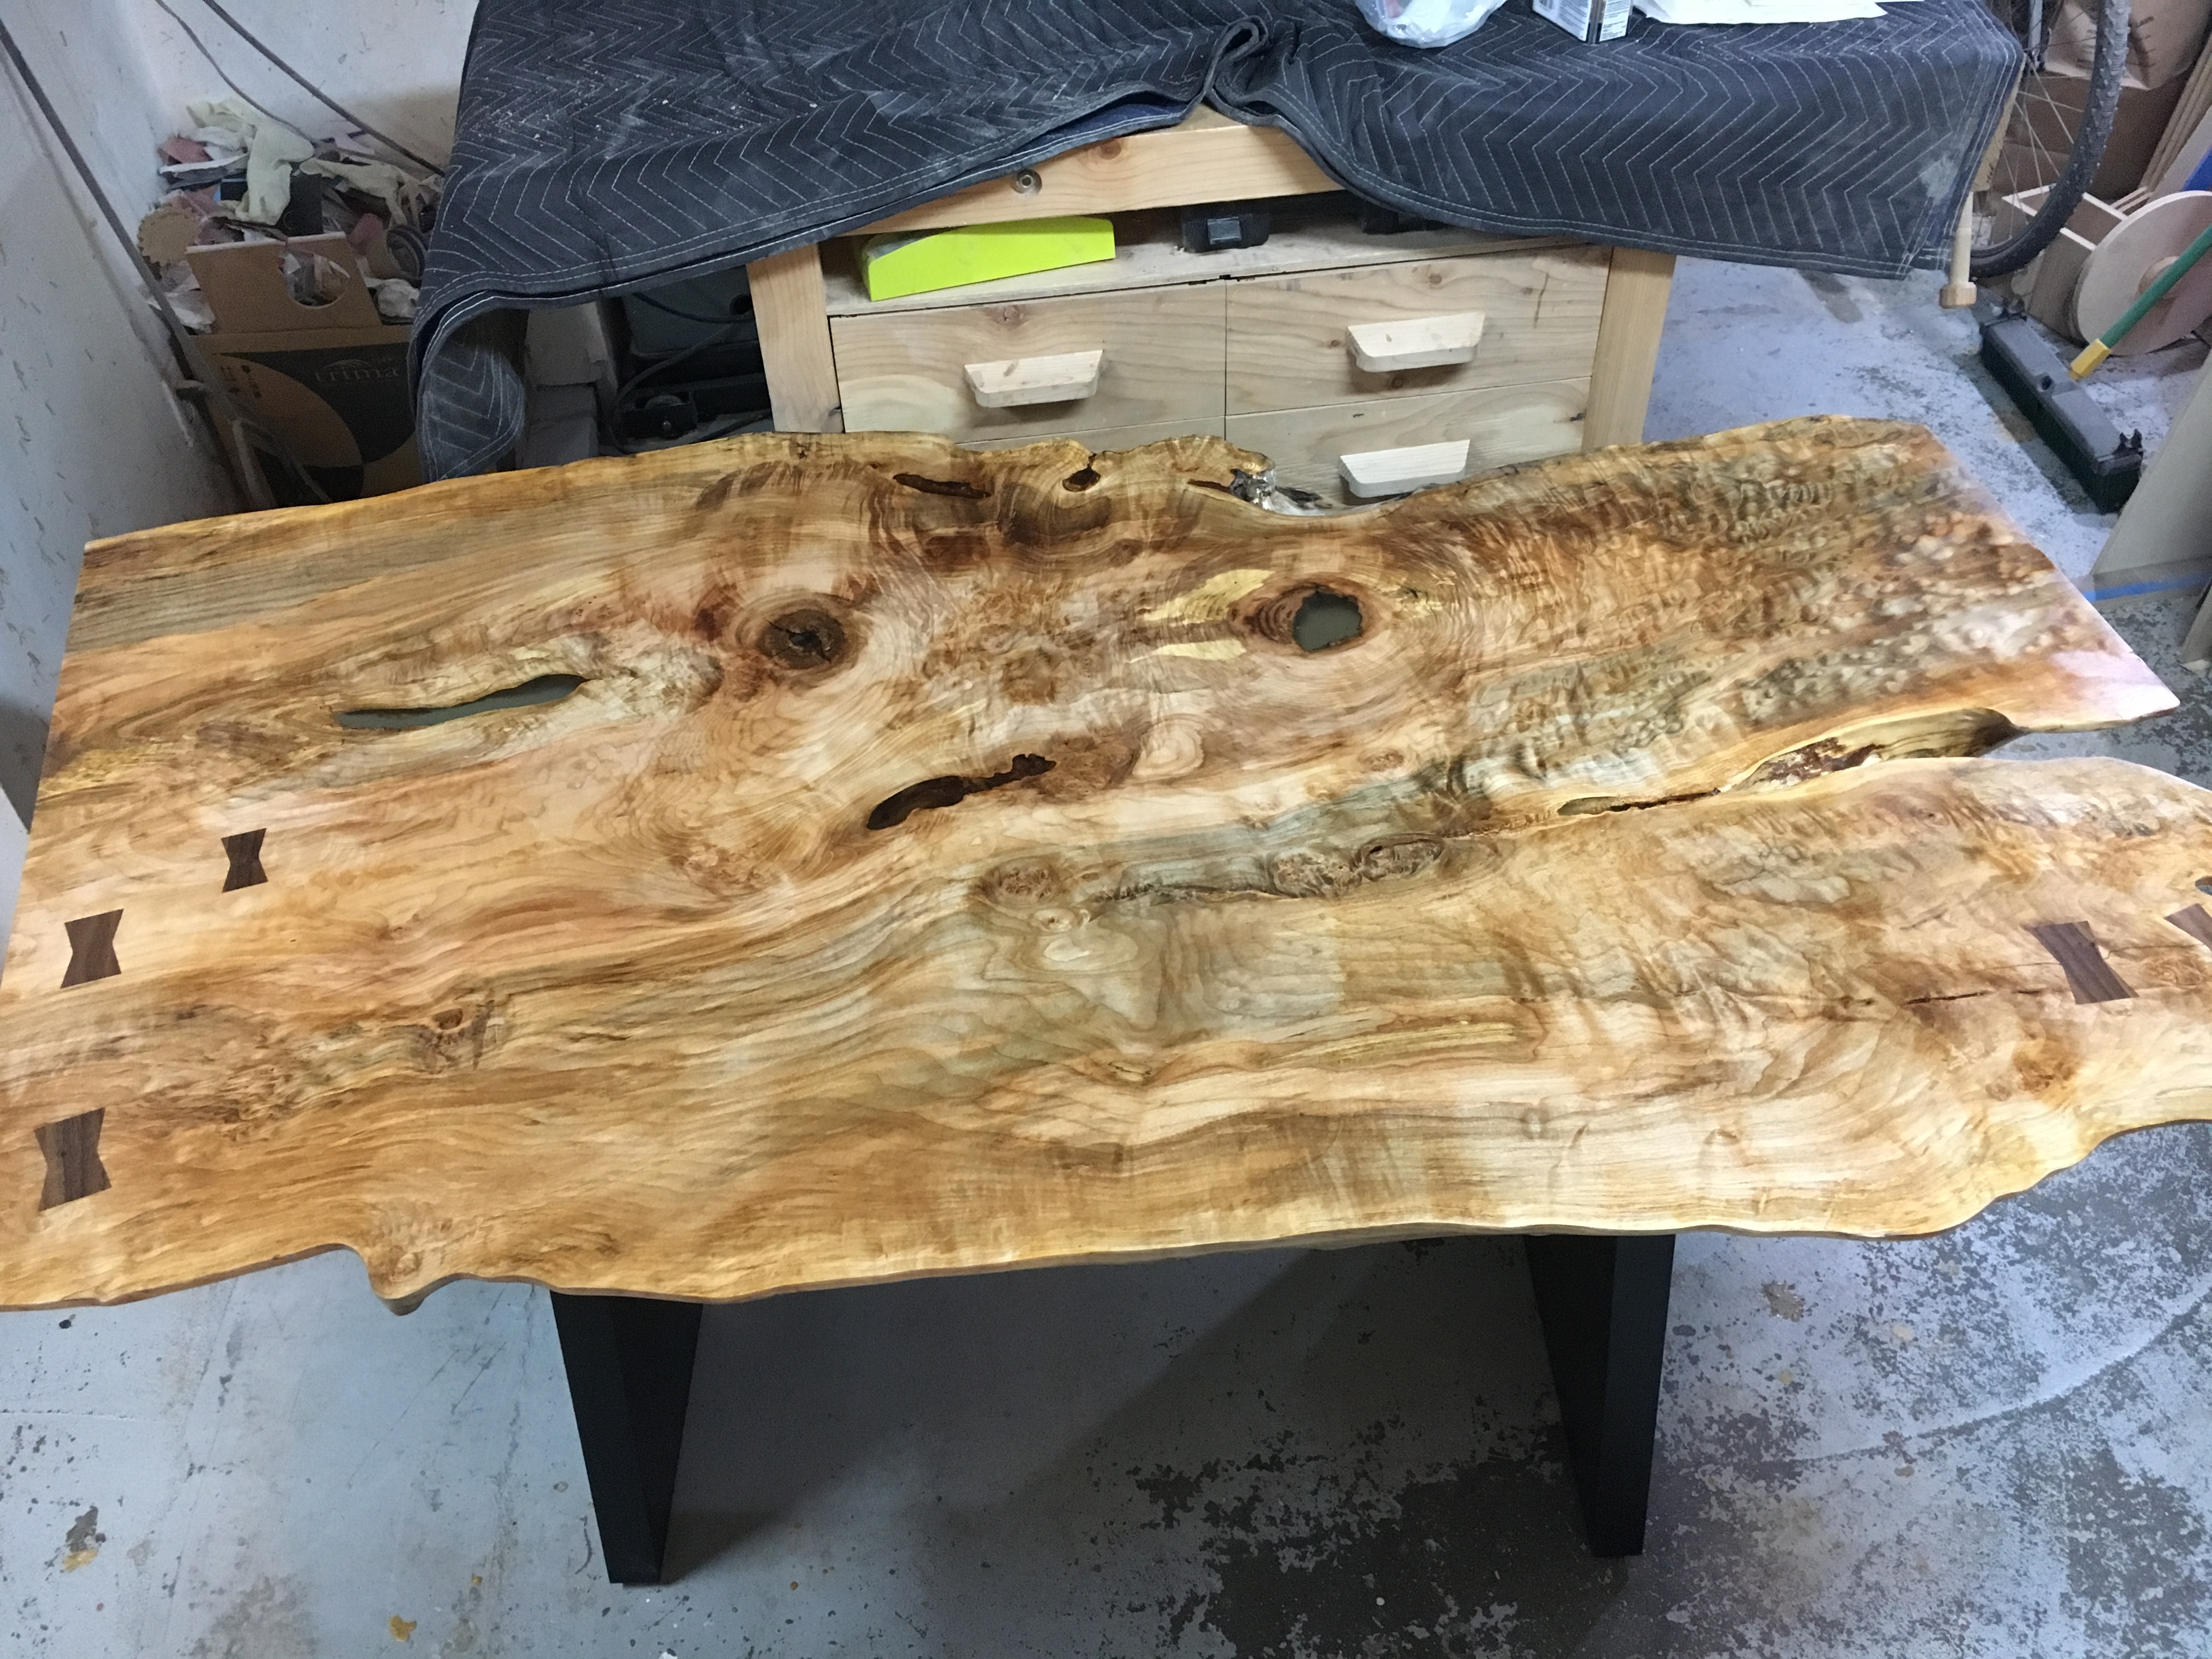
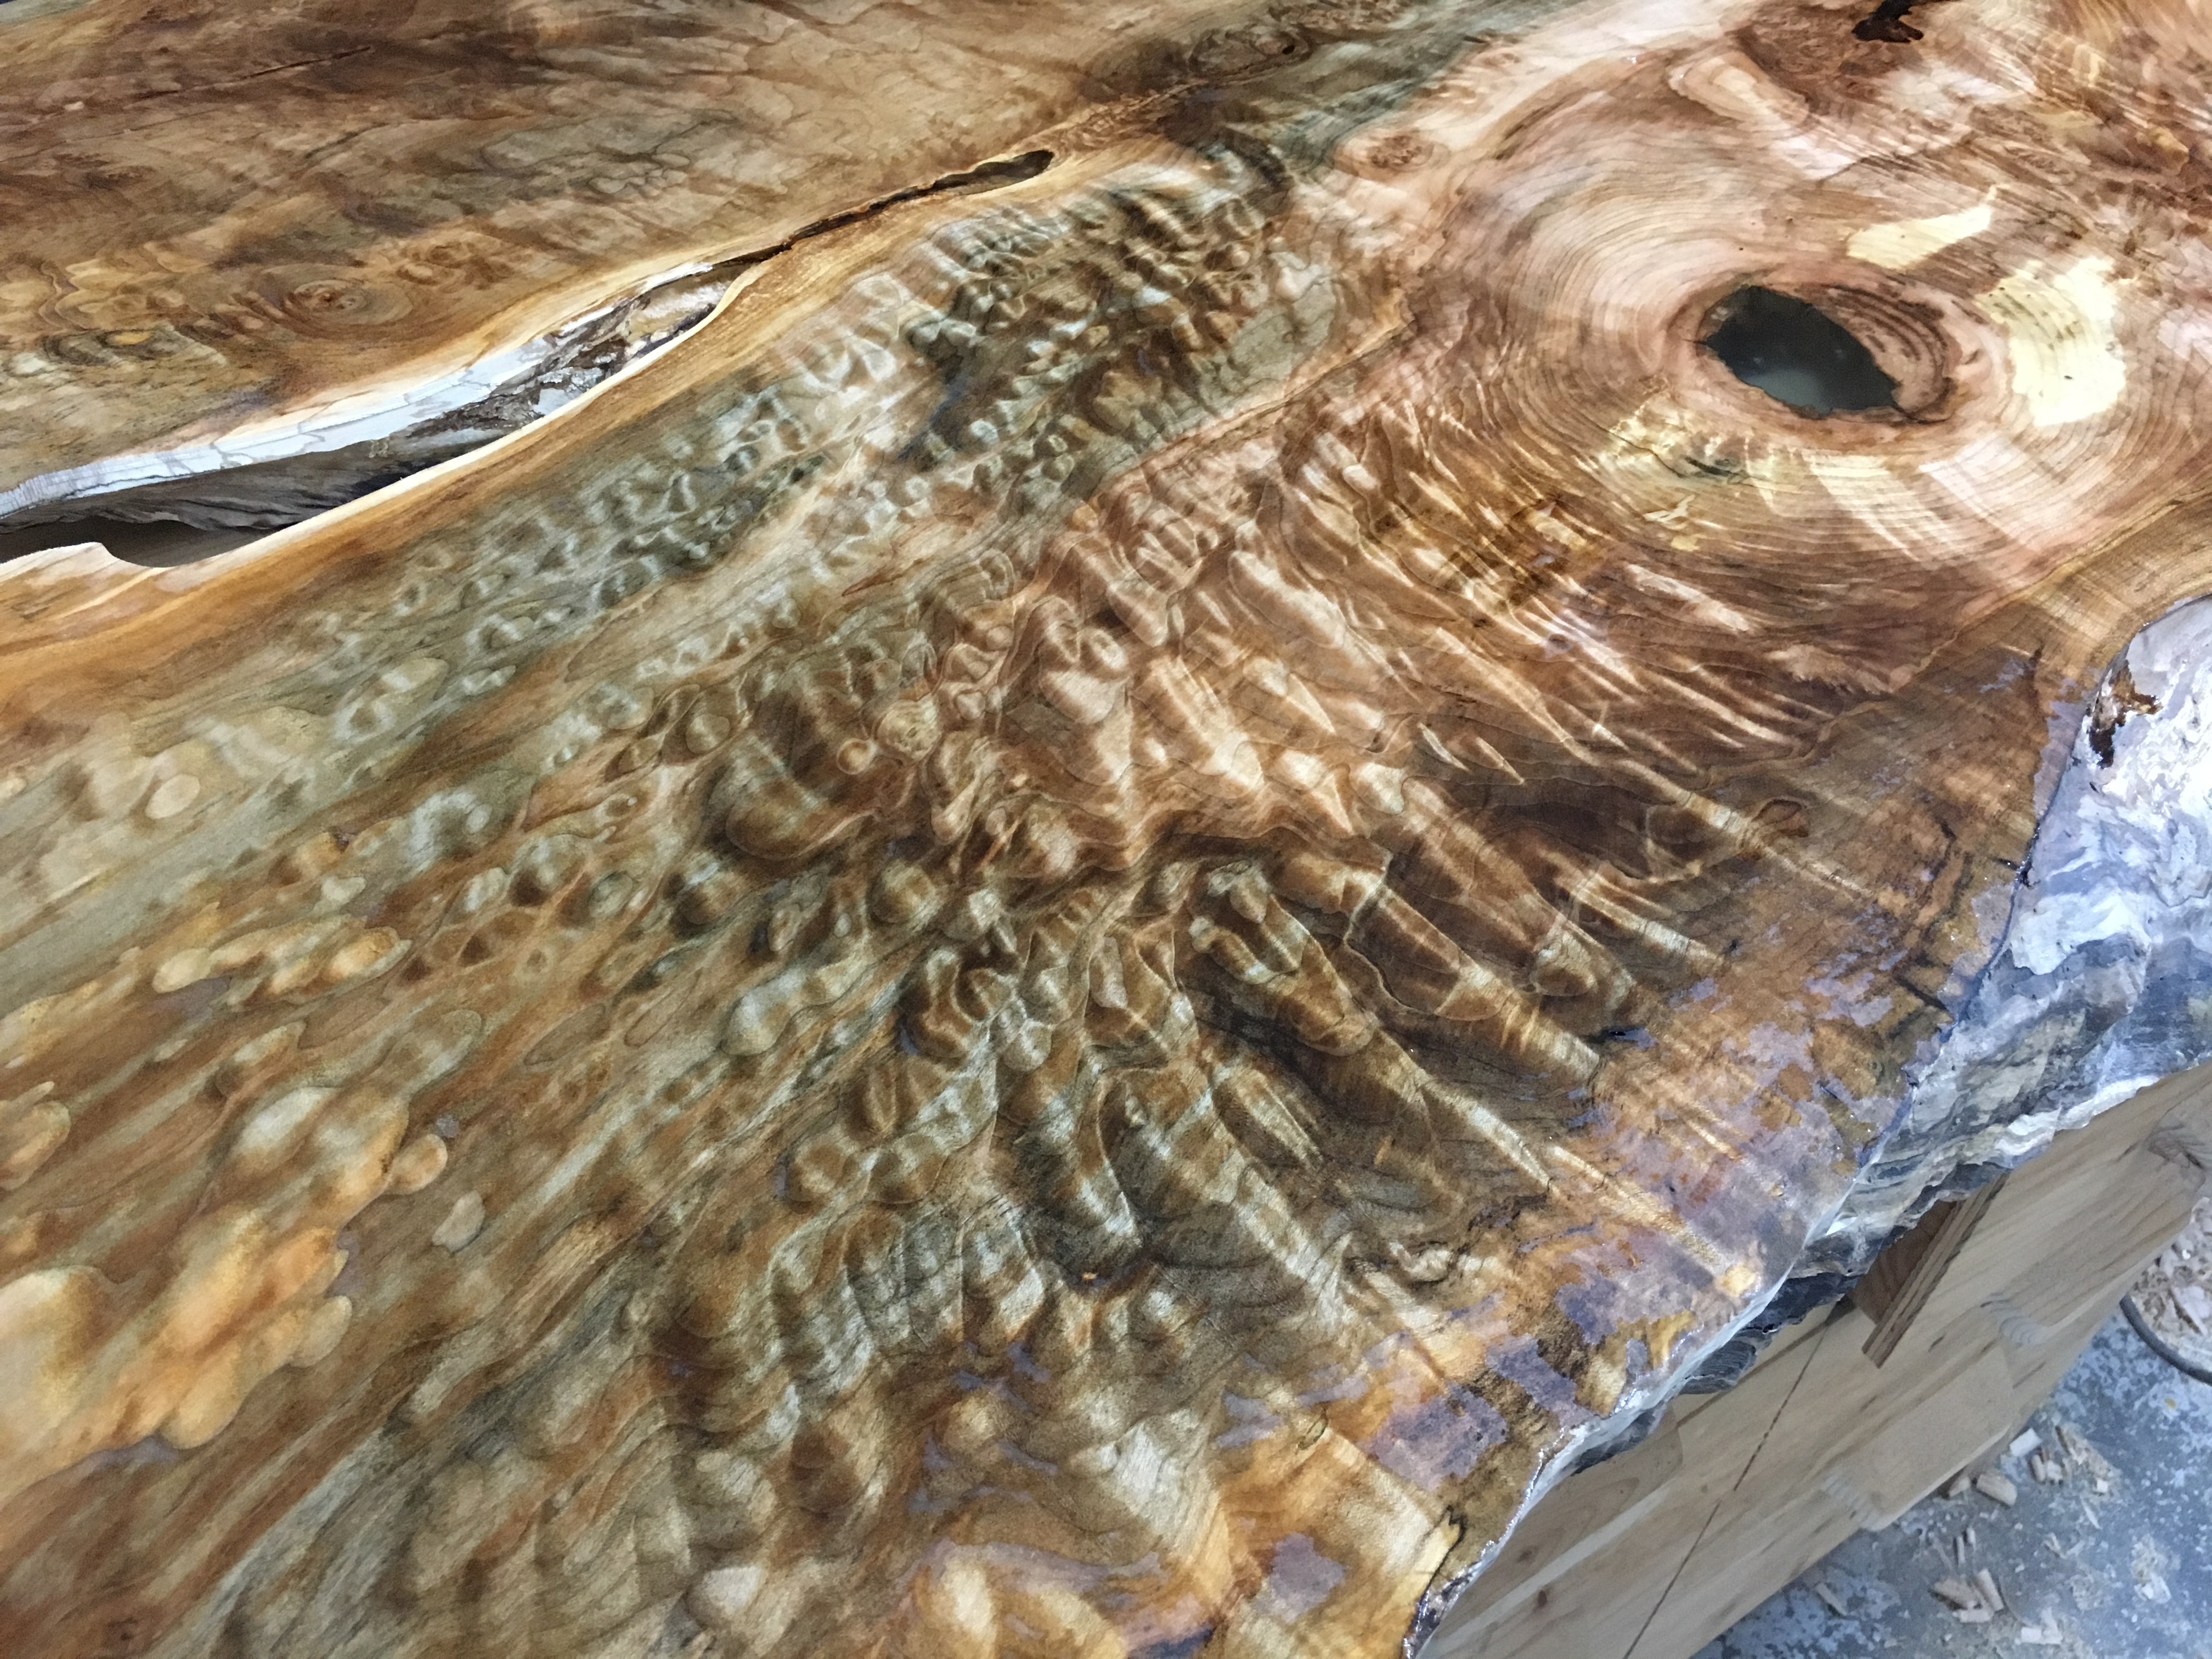
I turned my attention back to the slab. There were considerable voids in it, and they all had to be filled with resin. It’s hard to get a good seal when using masking tape on wood. what I usually do is to apply a bead of resin around the void that I have to fill, and cover that area with masking tape, making sure that the tape gets good contact with the resin. Once that’s cured, I have a leak-proof bottom to the void.
I used West Systems epoxy, mostly because I’m very familiar with it. I used the slow-curing hardener, and poured about 1/2” at a time in the voids, so as not to introduce cracks. There were through voids as well as shallow voids on both sides of the table, so this took several pours over the course of about a week and a half.
Some areas of the table had become really thin (and thus sharp) on the edges. I used a flush-trim bit to follow the organic shape of the edge about 3/8” down. This kept the look and feel of the natural edge, but ensuring that the lip was always at least 3/8” thick. In some places I had to interpretively cut away with a straight bit to remove sharp corners.
For the especially punky areas, I used wood hardener, which appears to be a sort of resin dissolved in acetone. In places that were even too porous for that, I used normal epoxy resin to soak in.
I wanted to be extra sure that there was no punky or porous wood that I’d missed so I mixed up a batch of epoxy to paint on thickly over the entire surface to soak in. Areas that soaked up their epoxy got extra. This had the pleasant side effet of allowing me to see what the finished top would look like.
Some sections of the slab have just the most beautiful flame pattern, which I find quite mesmerizing.
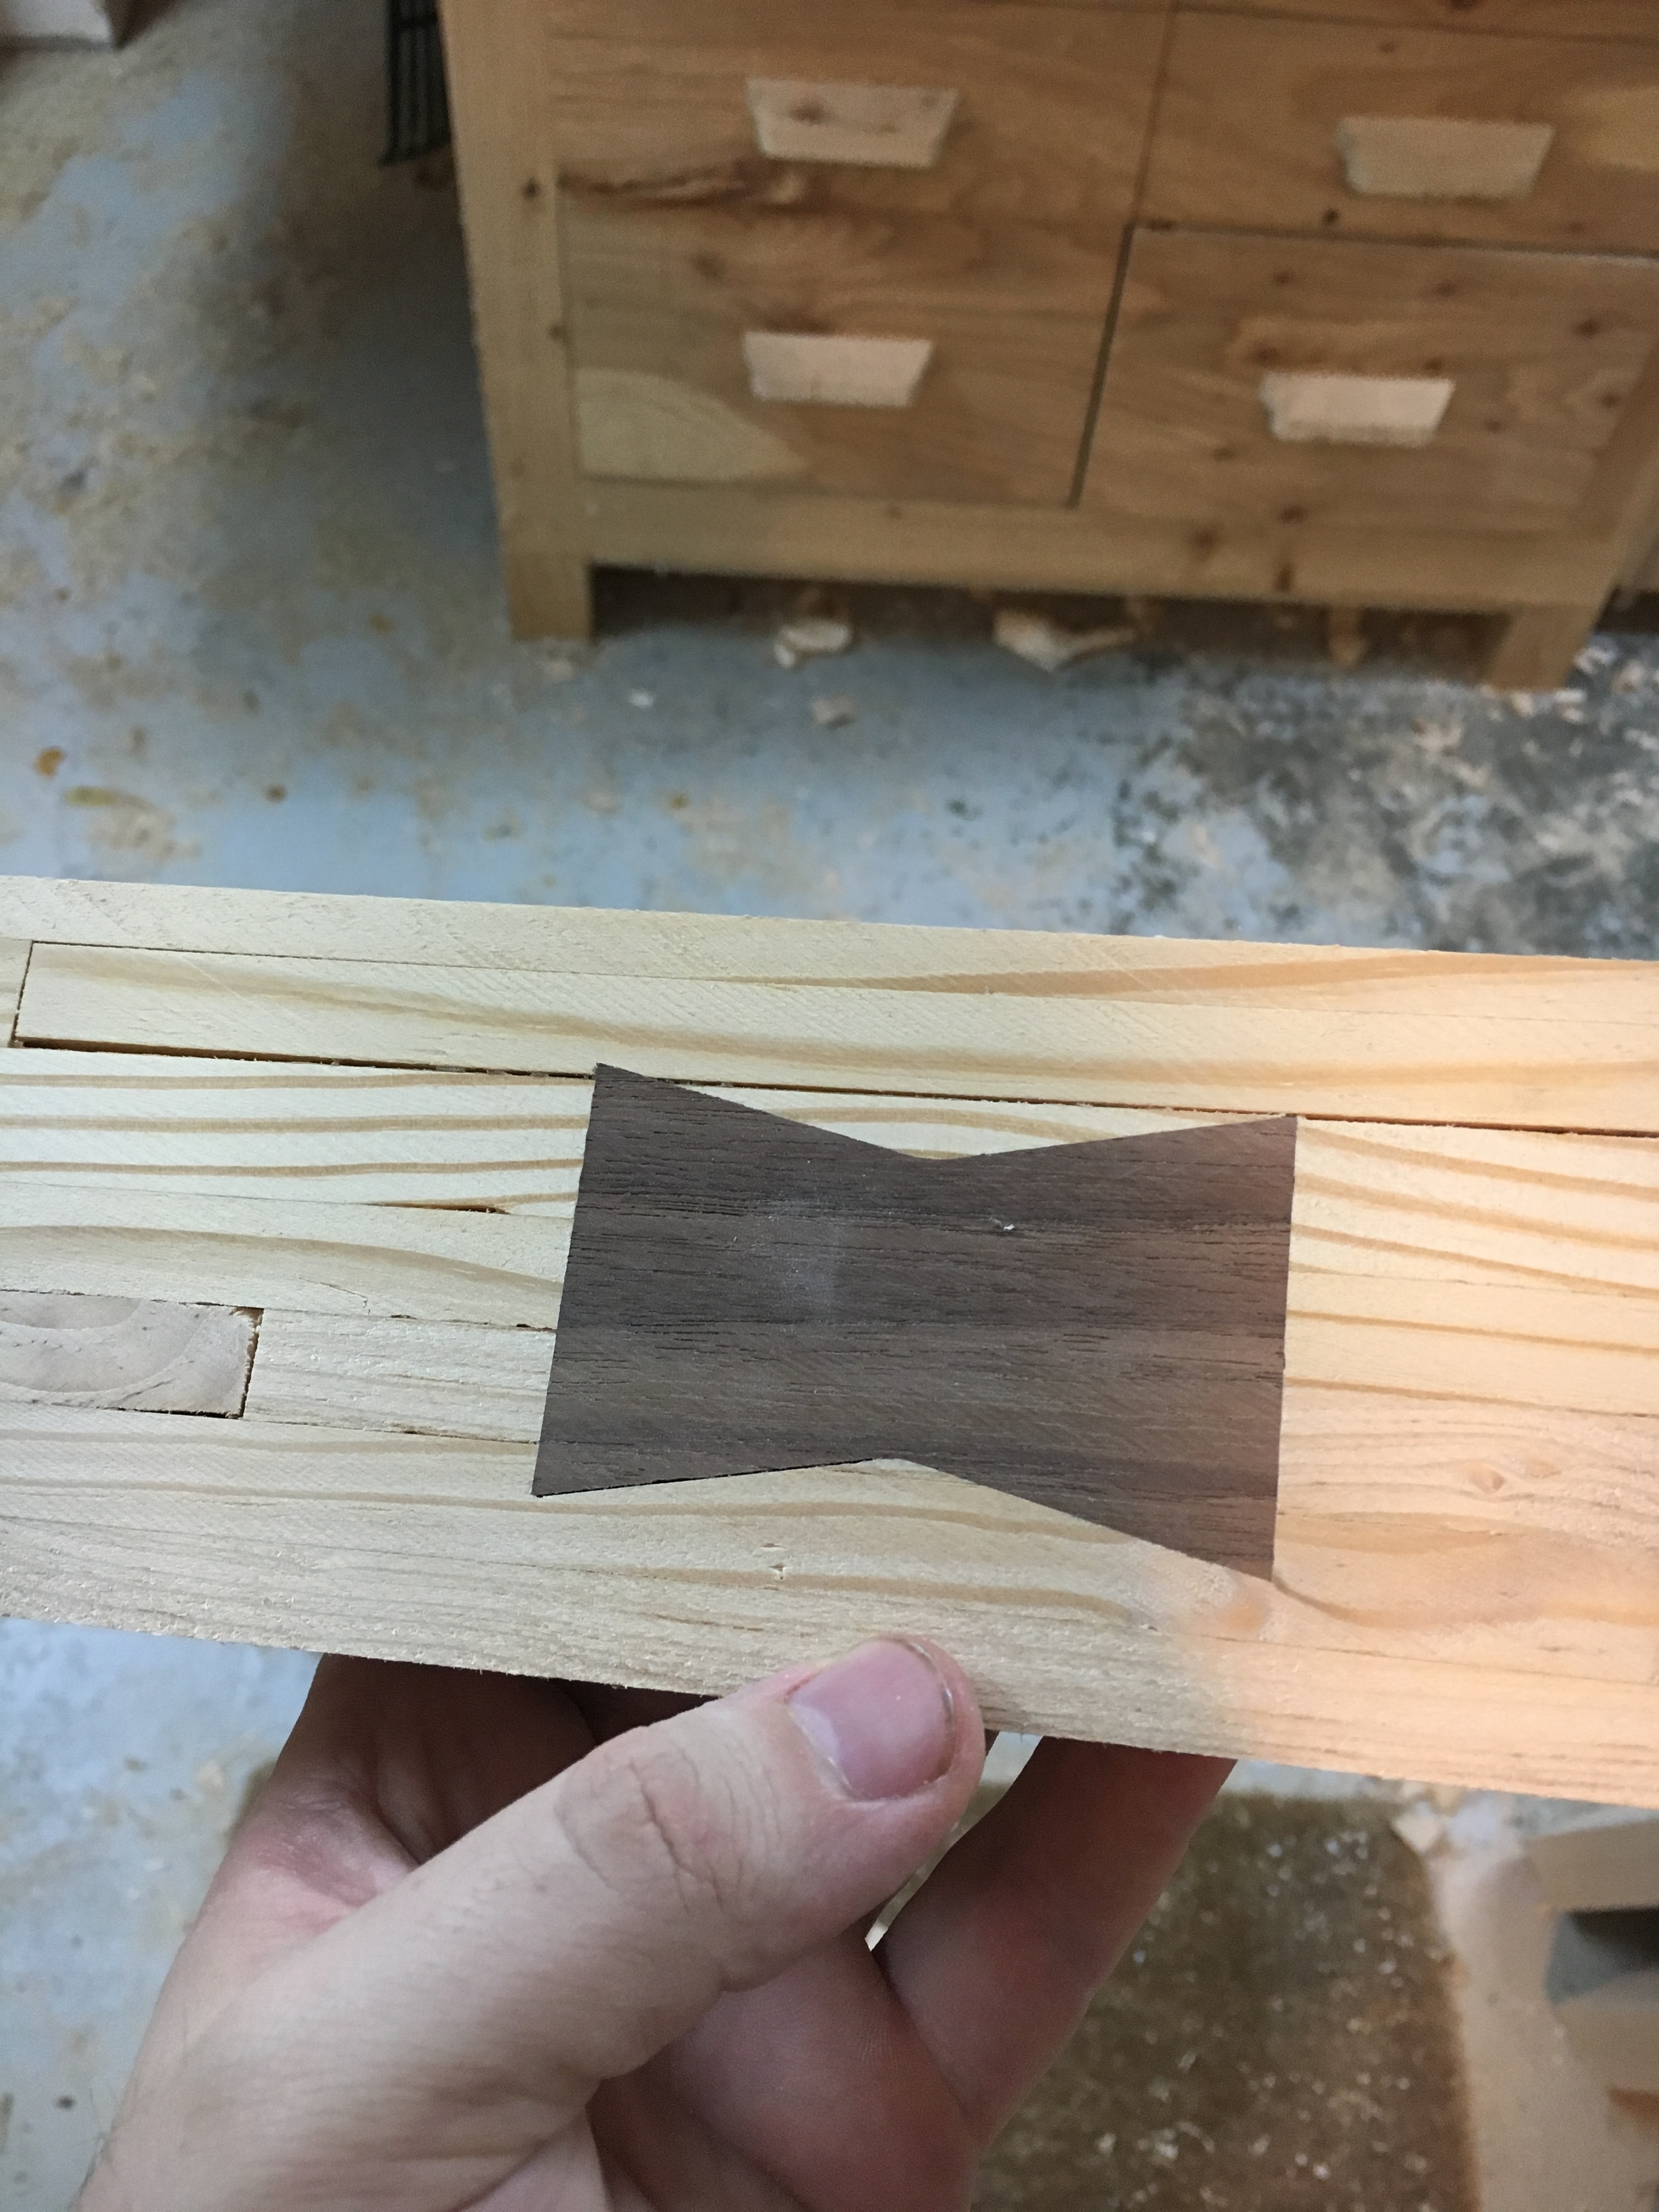
There were a few small cracks, and so to keep them from spreading, I added some butterfly joints. To do so, I first made a template from some 3/8” birch plywood and then used different sizes of router guide bushings and an 1/8” router bit to cut both the recesses and the butterflies. For instance, I could use a 3/4” bushing to cut the template, and then the 1/2” bushing to cut the recess. This ensures that the butterfly and the recess are identical. Identical, that is, except for some slightly-rounded corners in the recess which are easily cleaned up with a chisel. This is a test fit of one.
I dyed the legs and cross member black and applied several coats of wipe-on polyurethane. After sanding the top and bottom of the slab very diligently, I wiped on a couple coats of finish there as well. I then epoxied the cross-piece into the legs while they were resting unglued in the mortises of the table. This ensured that the cross-piece would glue in the right orientation, but then I didn’t have to do several stressful glue-ups at once.
Once cured, I epoxied the entire leg tenons into the mortises in the table. This could be considered a risky move. However, both the legs and the slabs were the same species, and their grain is oriented the same direction. It seemed to me, then, that the difference in their seasonal expansion and contraction should be very small.
At this point, it was all assembled, but far from finished. In particular, I still had to finish sanding the natural edge. I had been dreading and putting off this part because there were just so many odd surfaces and crevices.
I tried a number of different methods. I tried a wire brush. That seemed to remove a lot of dirt and bark and detritus so I tried using a wire wheel on a drill. That turned out to be too aggressive and left deep grooves where it was used.
I tried hand-sanding, but that was going to take forever. I tried carving burrs in a rotary tool to get into some difficult-to-reach places, and that worked quite well. I tried a palm sander for some of the bigger curves on the natural edge, but it proved too clunky and difficult.
In the end, the thing that worked the best was new wave sanding disks on an angle drill. They seemed a little expensive at first, but for how well they work and how much time they save, it was definitely worth the price.
I now had everything sanded and could coat the whole thing in several coats of wipe-on polyurethane. After a couple coats, some light sanding to remove any dust that had settled in the finish (despite my efforts to remove all dust from the surface), and then one last thin coat.
While finishing the bottom, I noticed that I could still see some light scratch marks in the resin. I did only sand the bottom up to 320, but for the top I wanted the resin surface to be perfect. I got some additional sandpaper to go from 600 to 1500, put on some TV and settled in for a heck of a lot of hand sanding to get the resin perfect.
After I was satisfied with the top, I removed all the dust I could first with compressed air, then rubbing it down dry and then with some mineral spirits. I let it dry and applied the first coat of wipe-on-poly on the top. Despite all the effort to remove dust, I could still see sort of streaks through the finish. They disappeared after some light sanding, but I figured maybe putting on lighter coats would help. Nope. Same problem.
Whenever I have trouble with wiped-or-painted on finishes, I find that switching to a spray finish usually solves all my issues. This was no exception. After a few coats of spray-on polyurethane, the table has a nice matte sheen.